Introduction
This article outlines the general installation process for deploying a Field Effect MD physical appliance into your network infrastructure using the inline configuration.
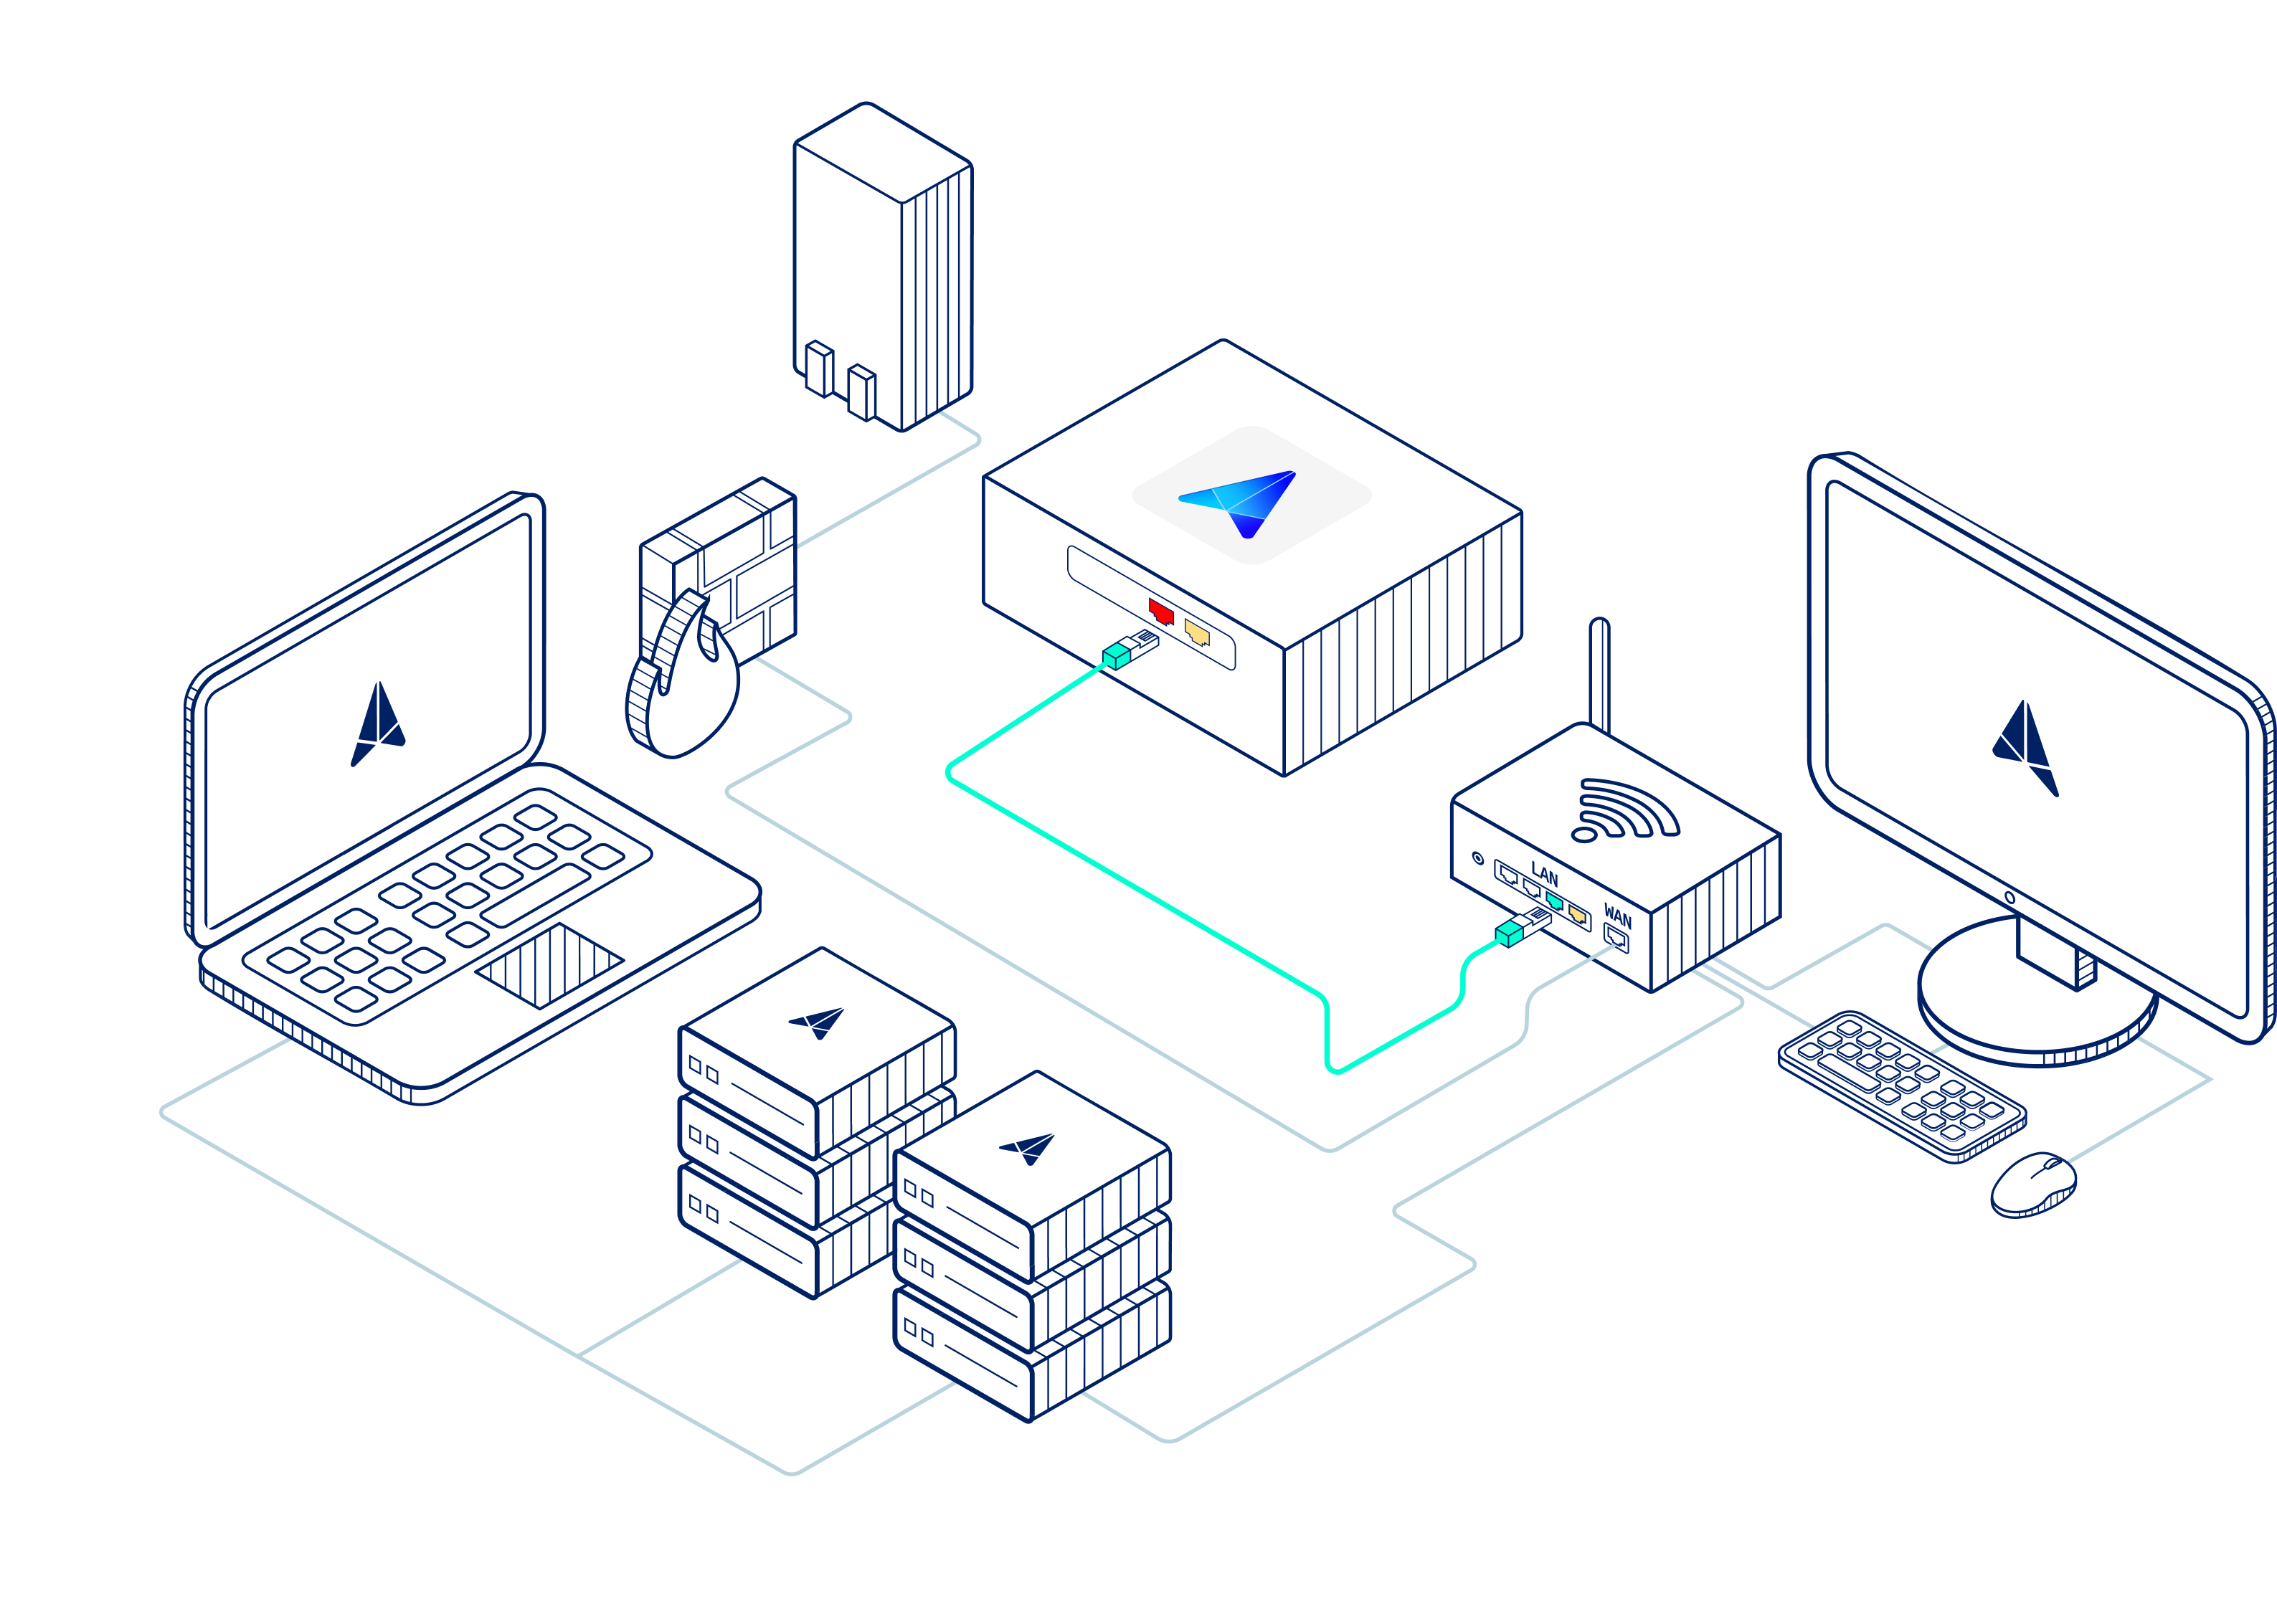
While the figures below do not specify the unique appliance form factors, this process applies to any Field Effect MDR physical appliance that supports the inline configuration. For more detailed instructions with specific figures, view our configuration guide for your organization's appliance.
For more high-level content about our physical network appliances, their specifications, and frequently asked questions, see Physical Network Appliances: Overview and Specs.
Table of contents
Notes for this Procedure
You may need to make firewall exceptions that allow outbound connections to Field Effect’s specific domains and ports. To learn more, visit Firewall Exceptions for Network Appliances and Endpoint Agents.
We also recommend establishing a MAC address reservation for each physical appliance using a DHCP lease. The functionality is a DHCP feature that allows you to assign a specific IP address to a device based on its MAC address. Assigning a reserved IP to the appliance this will help boost reliability and remove complexity in terms of connectivity. Benefits include:
If the appliances reboots, it will quickly reestablish its connection with Field Effect.
You can leverage firewall rules to maintain a more reliable connection.
It helps ensure that syslogs are being sent correctly.
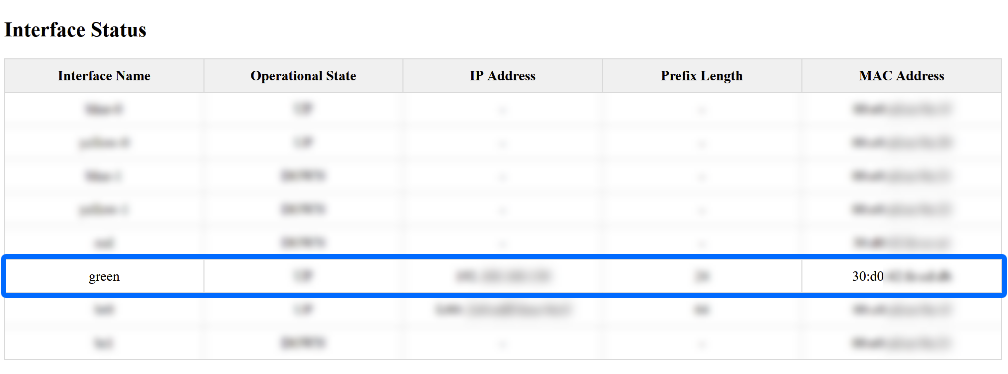
To find the MAC address for the green connection (aka interface) on your appliance, navigate to your Appliance Status Page and reserve the MAC address for the green interface.
Other Notes and Considerations
- Every physical network appliance ships with a USB YubiKey, which is a security device that works as a physical form of multi-factor authentication. The appliance will not power on unless the YubiKey is plugged into a USB port. Ensure that the YubiKey is properly connected before powering on the appliance.
- If standard DHCPs are provided, you can connect the appliance directly to the internal network device via the management port (green).
- If you can’t provide a DHCP lease, a static IP can be assigned, and the steps are included in the appendix of this article.
- The appliance must be installed pre-NAT for full visibility into all network traffic.
- When installing an appliance within your physical IT environment, ensure to place it in the proper orientation as shown in this guide. If it's positioned in a way that restricts airflow, it may create performance and/or hardware issues.
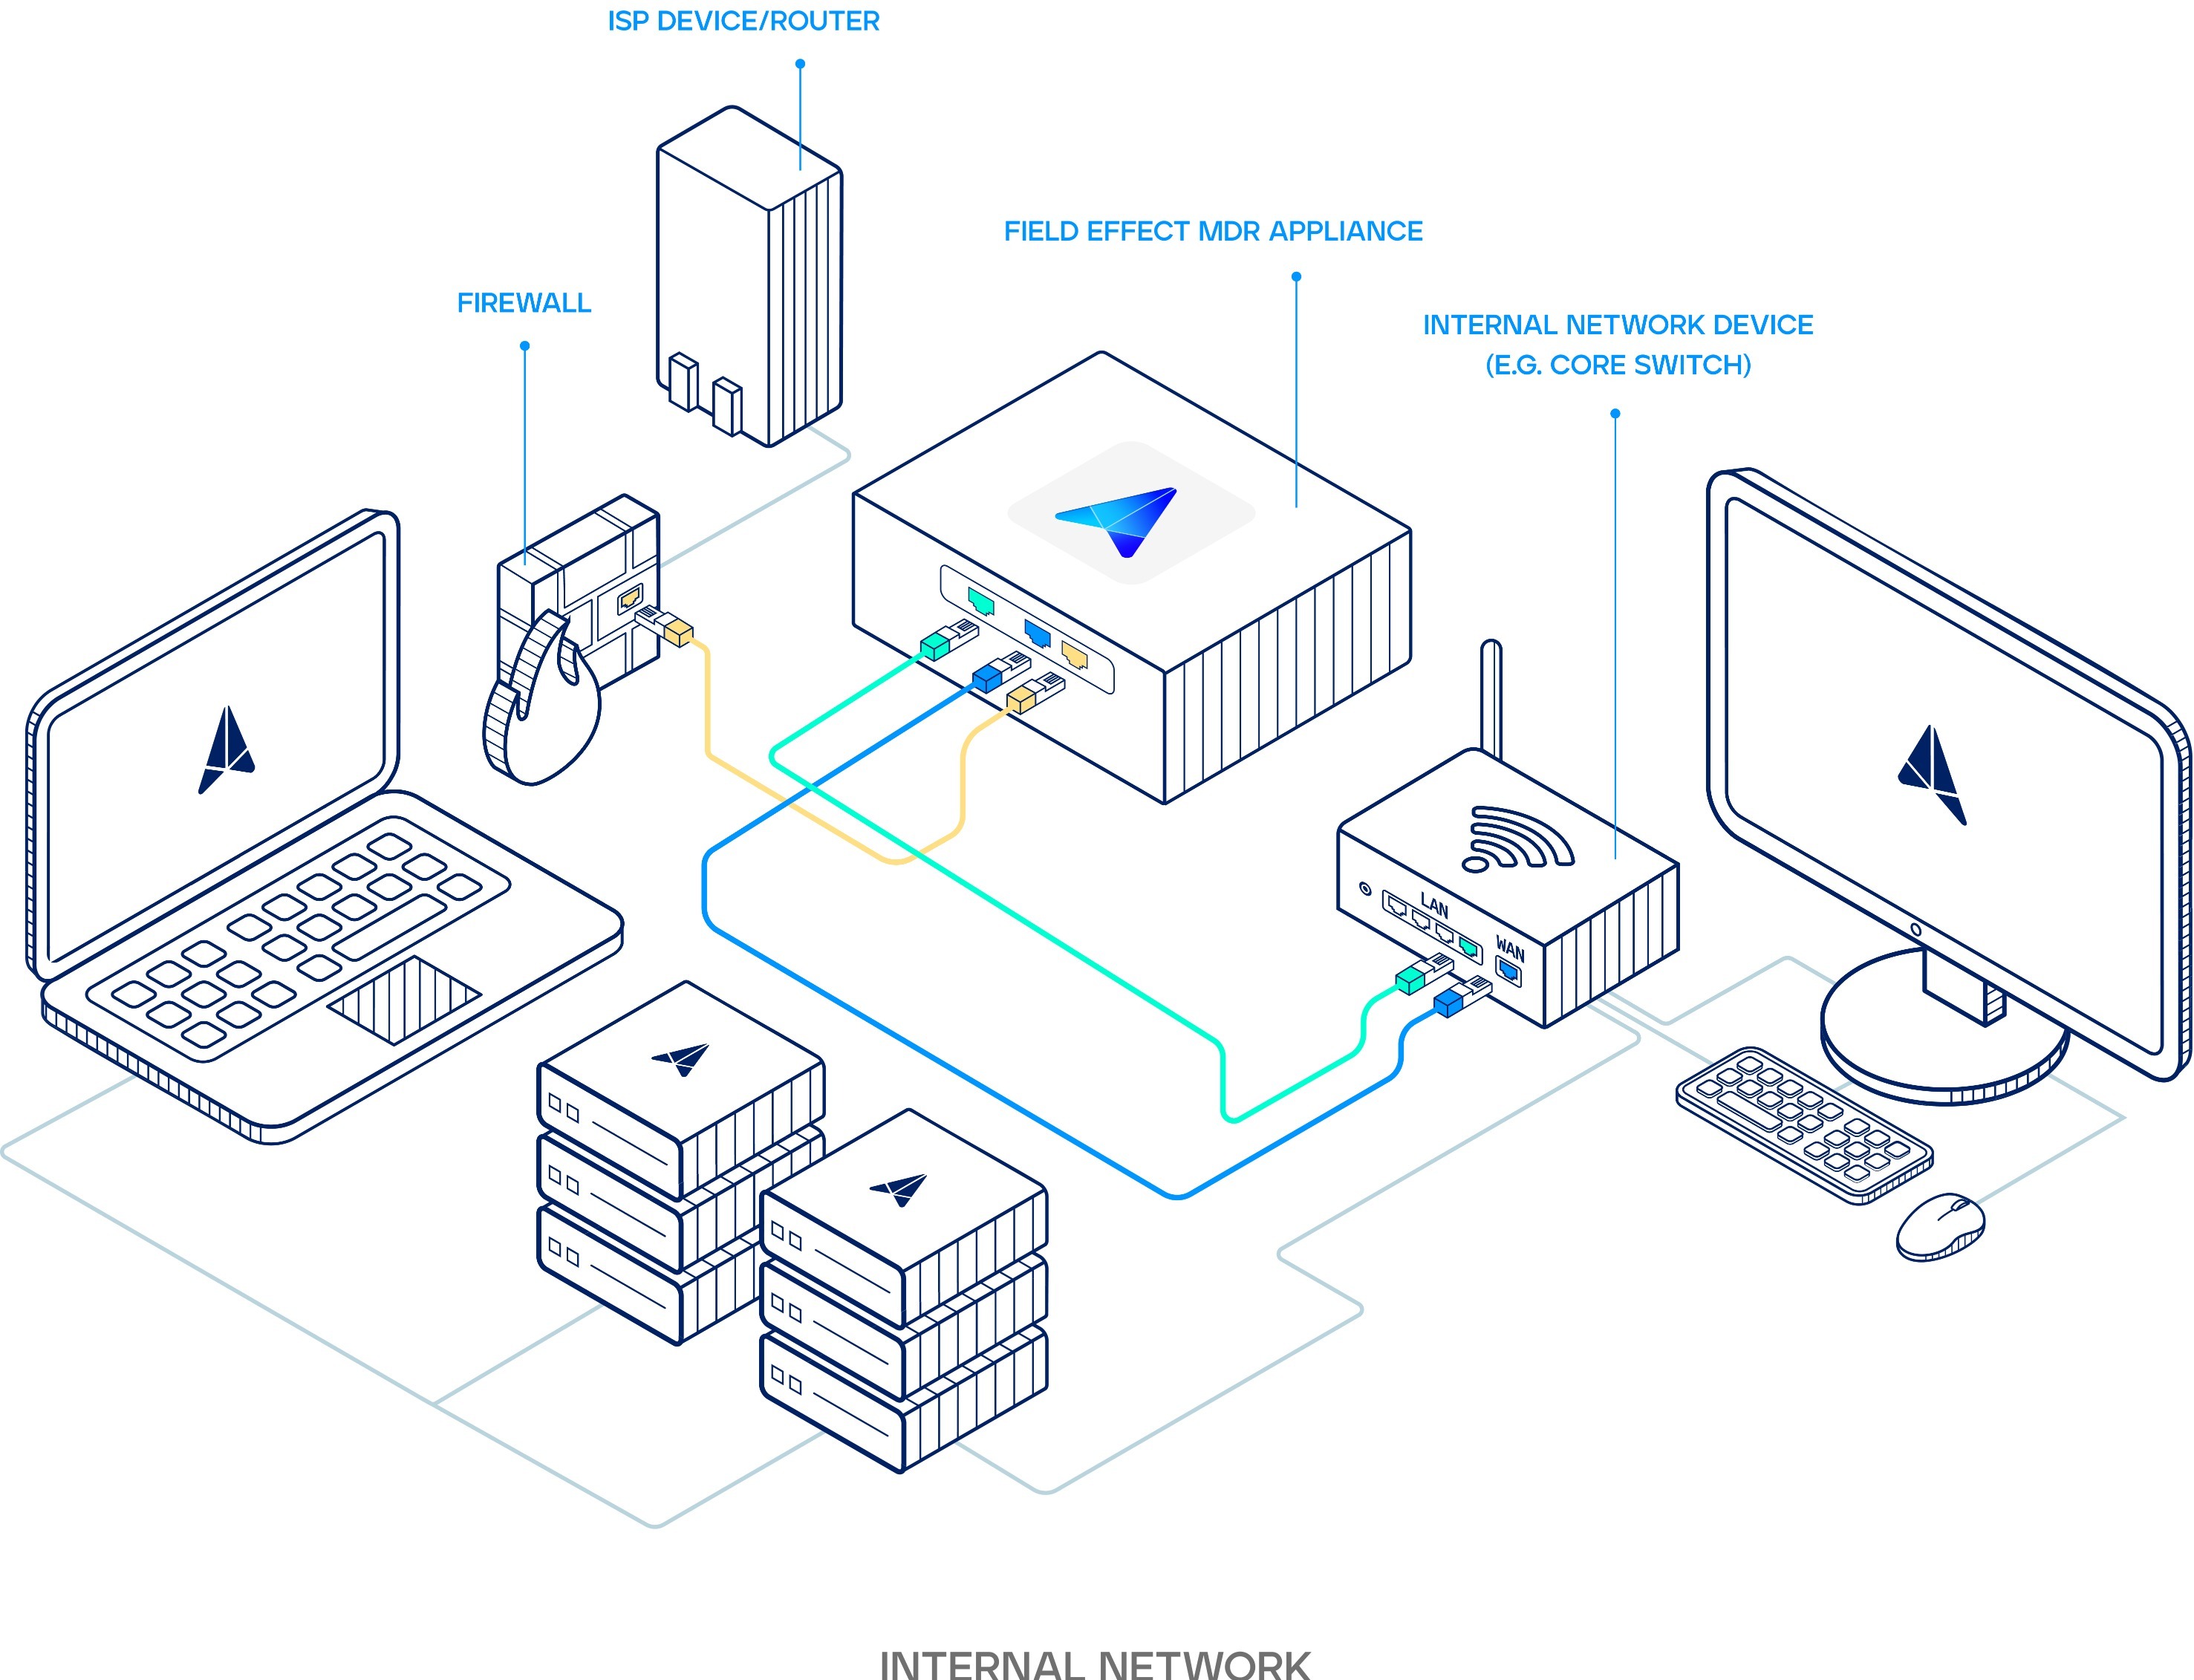
Procedure: Inline Configuration
When using the inline configuration, the appliance sits in between your network's primary switch and firewall. All network traffic is directly passed from the switch, through the appliance, and then out through your firewall.
The illustration below shows the connections required for an inline configuration:
- Yellow: Inbound connection from the WAN to the appliance.
- 1Gbps bridge to capture network traffic.
- Blue: Outbound connection from the appliance to the LAN.
- 1Gbps bridge to capture network traffic.
- Green: Outbound VPN connection.
- Used to connect to Field Effect’s data center(s).
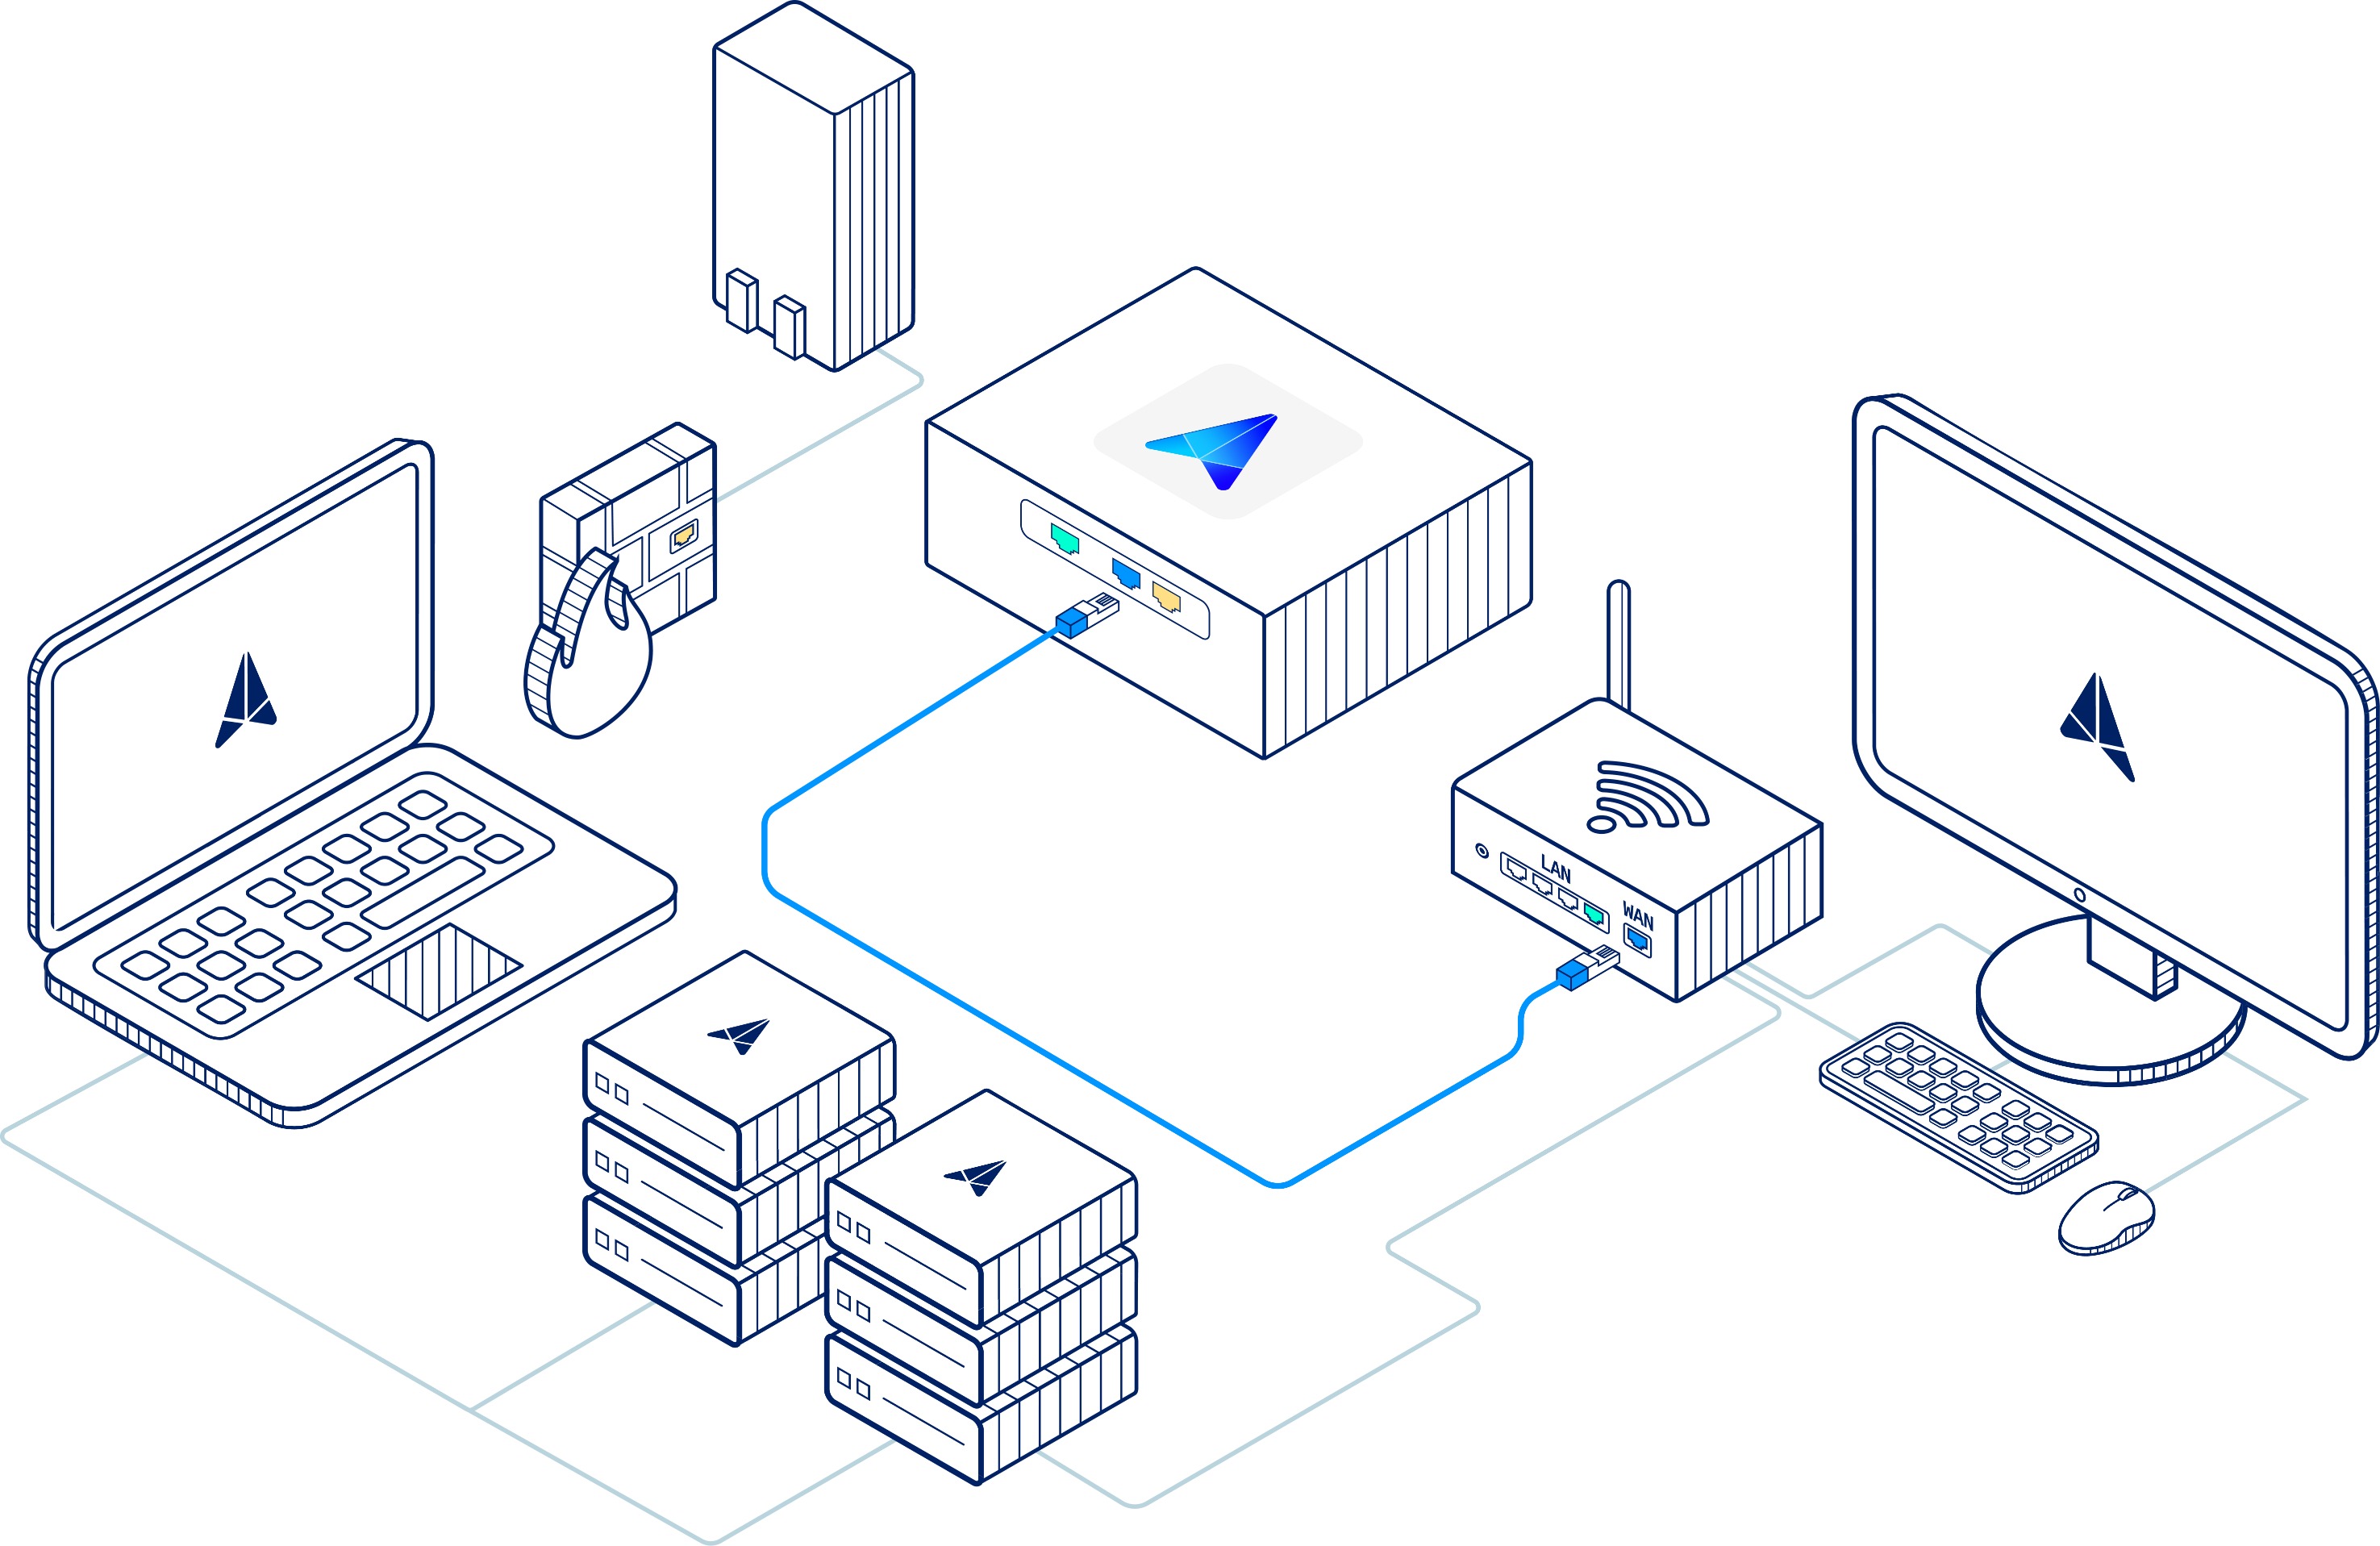
Making the Yellow Connection
Begin by unplugging both ends of the network cable that connects the LAN port on your firewall and the WAN port on your core switch. This will disable your Internet connection. Plug the provided yellow cable into the LAN port you just unplugged on your firewall. Plug the other end of the yellow cable into the yellow port on your appliance.

Making the Blue Connection
Begin by plugging the blue cable into the blue port on your appliance. Plug the other end of the blue cable into the WAN port you disconnected on your core switch. This will restore your Internet connection. To confirm an internet connection has been reestablished, navigate to a website using a computer connected to this switch.
If applicable: using additional blue and yellow cables, repeat steps 1-4 to connect any additional links you wish to monitor.
Making the Green Connection with a DHCP lease (preferred)
Once network connectivity is restored, plug one end of the green cable into any network port on any switch with internet access. Then connect the other end of the green cable into the green port on your appliance.
If you can’t provide a DHCP lease, see the appendix at the end of this article.
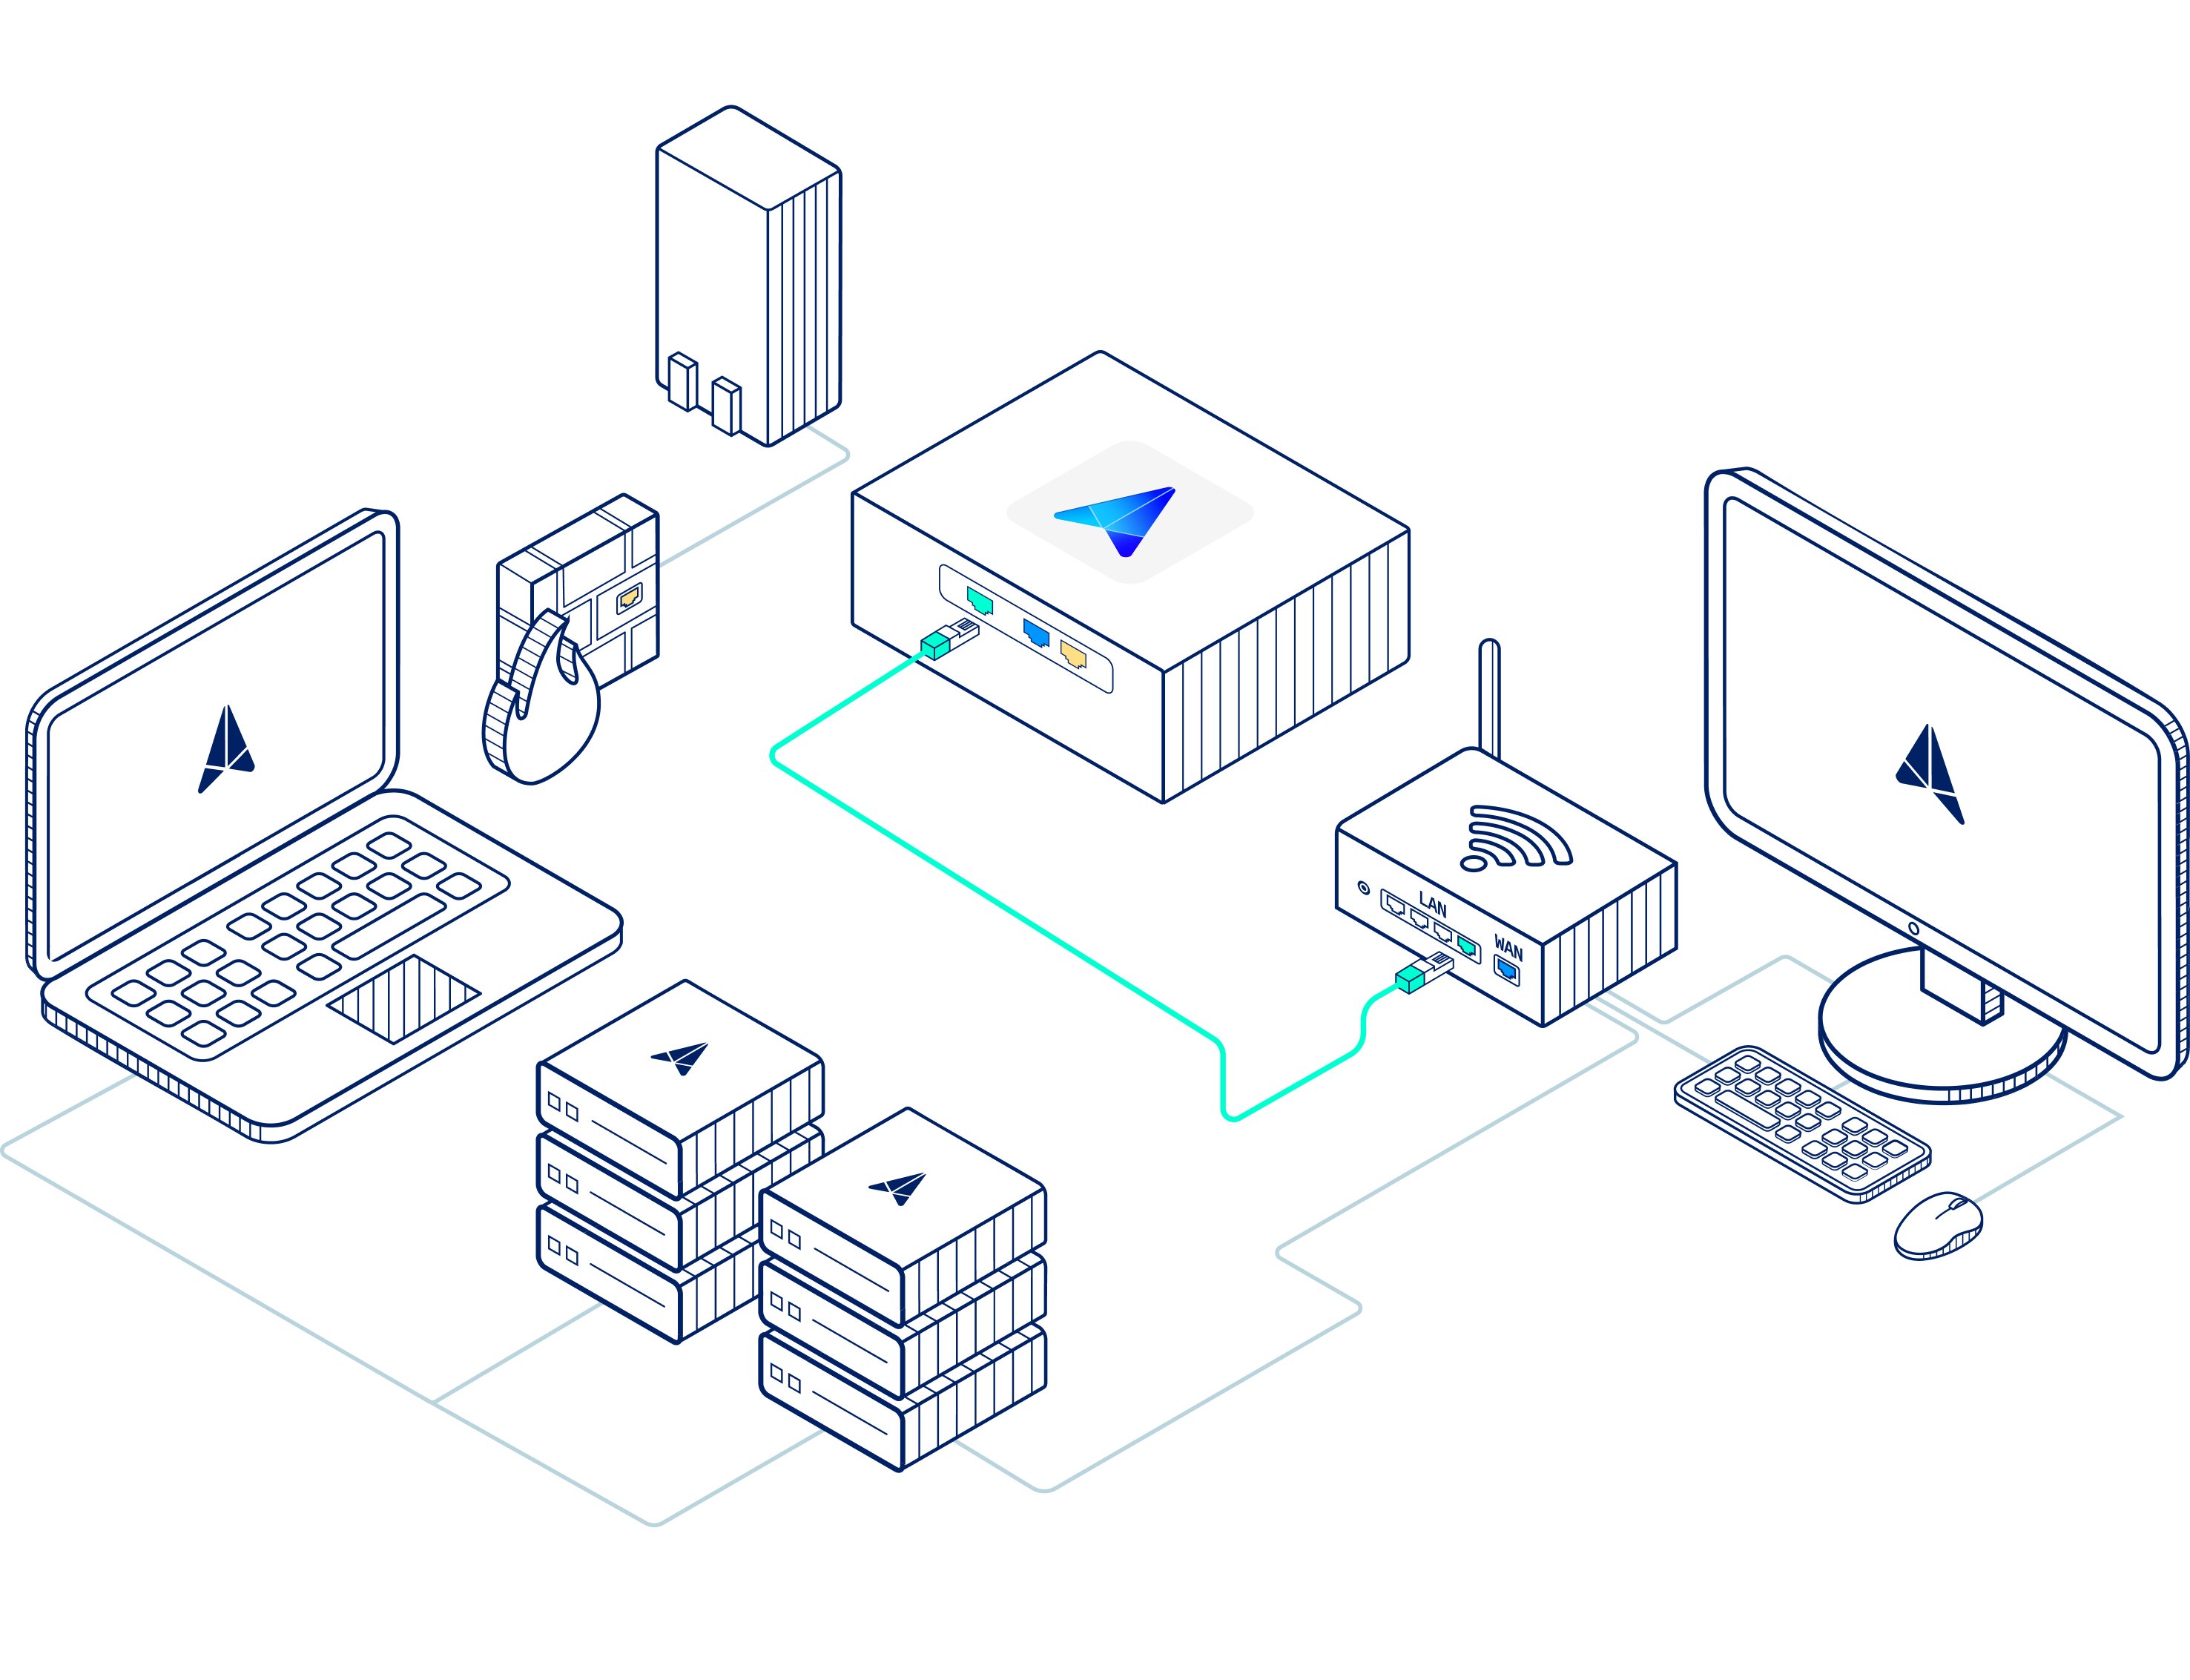
We recommend establishing a MAC address reservation for each physical appliance using a DHCP lease. The functionality is a DHCP feature that allows you to assign a specific IP address to a device based on its MAC address. Assigning a reserved IP to the appliance this will help boost reliability and remove complexity in terms of connectivity. Benefits include:
If the appliances reboots, it will quickly reestablish its connection with Field Effect.
You can leverage firewall rules to maintain a more reliable connection.
It helps ensure that syslogs are being sent correctly.
To find the MAC address for the green connection (aka interface) on your appliance, navigate to your Appliance Status Page and reserve the MAC address for the green interface.
Powering the Appliance
Now that the appliance is properly connected, you can power on the Business 1 appliance. Ensure the power cable is plugged in, and power it on. Once powered on, it will receive an IP address and connect to our data center. The IP address should be reserved on your DHCP server.

Note: Every physical appliance ships with a unique YubiKey, which is a security feature that works as a physical form of multi-factor authentication. The appliance will not power on unless the YubiKey is plugged into a USB port. Ensure that the YubiKey is properly connected before powering on your appliance.
To confirm connectivity, browse to the appliance status page or connect to the appliance console.
Appendix: Static IP Addresses
If you can’t provide a DHCP lease, plug one end of the green cable into any network port on any switch with internet access. Then plug the other end of the green cable into the red port on your appliance.
After making the connection above (green cable into red port), connect a monitor and keyboard to the appliance and contact support@fieldeffect.com for your login credentials. After logging in to the appliance, you’ll be presented with a console where you can configure a static IP.
Was this article helpful?
That’s Great!
Thank you for your feedback
Sorry! We couldn't be helpful
Thank you for your feedback
Feedback sent
We appreciate your effort and will try to fix the article