Introduction
This article walks through the process of enabling Antivirus Management in the Field Effect MDR Portal. After completing this procedure, please allow 1-3 hours for all the changes to take effect across all endpoints. To learn more about this feature, see our overview article.
This article covers the following topics:
Enabling Antivirus Management
If you're a Field Effect Partner, this feature is enabled on a per-client basis. Before enabling this feature, make sure the organization selector is set to the client you want to enable this feature for.
To begin, navigate to the Administration section's Antivirus Management tab and click the enable toggle.

The configuration window will open. Select the management mode want the feature to run in. After making your selection, click Next.
- Audit: Field Effect MDR will monitor the antivirus configurations all devices with an endpoint agent installed and report any antivirus configurations that do not comply with your preferences (which are determined during this set up process).
- Enforce: Field Effect MDR will not only report on non-compliant endpoint configurations, but actively change them the align with your preferences.

Step two allows you to adjust Microsoft Defender's threat protection settings. After making your selections, click Next.
- Real-Time Protection: Continuously monitor your devices and ensure they are actively protected by scanning files and programs as they are accessed or executed.
- Cloud-Delivered Protection: Take advantage of emergency dynamic intelligence updates. When you turn on cloud protection, fixes for malware issues can be delivered via the cloud within minutes, instead of waiting for the next update.
- Automatic Sample Submissions: Allow Microsoft Defender to send file samples to cloud protection when more intelligence is needed to verify the intent of a suspicious file.

The third step gives you the opportunity to set the Cloud-Delivered Protection and Automatic Sample Submissions settings. After making your selections, click Next.
Cloud-Delivered Protection:
Takes advantage of emergency dynamic intelligence updates. When enabled, fixes for malware issues can be delivered via the cloud within minutes, instead of waiting for the next scheduled update.
- Basic
- Advanced
- Disabled
Automatic Sample Submissions:
Allows Microsoft Defender to send file samples to cloud protection when more intelligence is needed when verifying the intent of a suspicious file.
- Always Prompt
- Send Safe Samples Automatically
- Send All Samples Automatically
- Never Send

The fourth step allows you to configure exclusions for the feature. If there are any paths, software, or process names you would like to exclude, add them in the appropriate field.
After adding your exclusions, click Next.

On the fifth step, you can select whether you'd like to enable/disable SmartScreen and Potentially Unwanted Applications (PUAs) for the feature.
- SmartScreen: scans app and file downloads to protect against phishing or malware websites, applications, and other potentially malicious files.
- PUA Protection: blocks PUAs and any attempts to download, move, run, or install them.
After making your selections, click Next.

On step six, you can configure the feature’s scan preferences. After making your selections, click Next.
| Setting | Description |
|---|---|
| Scheduled Scan Type | Specifies the type of scan used for scheduled scans (Quick Scan, Full Scan) |
| Scan Time | The start time for daily scans. |
| Catch-up Scans | Initiates a quick scan when two scheduled scans fail to run. |
| Start scan when not in use | Starts the scheduled scan when the computer is on but not in use. |
| Max CPU Utilization | Specifies the maximum CPU utilization percentage during a scan. |
| Check for protection updates before a scan | Forces Microsoft Defender to check and download protection updates before running a scheduled scan. |
| Scan Archive Files | Scans archive files such as .zip or .rar files for malicious or unwanted programs |
| Scan Network Files | Scans files on the network for malicious or unwanted programs. |
| Scan Removable Drives | Scans removable drives during full scans. If disabled, removable drives may still be scanned during a quick scan. |

Step seven allows you to configure the feature's Signature Update Preferences. After making your selections, click Next
| Preference | Description |
|---|---|
| Signature Update Interval (hours) | Specifies the interval for security intelligence update checks. |
| Signature Catch-Up Interval (days) | Specifies the number of days after which a catch-up security intelligence update is required. |
| Update Signatures on Startup | Checks for and downloads protection updates when the device is started. |
| Update Signatures from Microsoft Update | Downloads the latest security intelligence from Microsoft Update. |

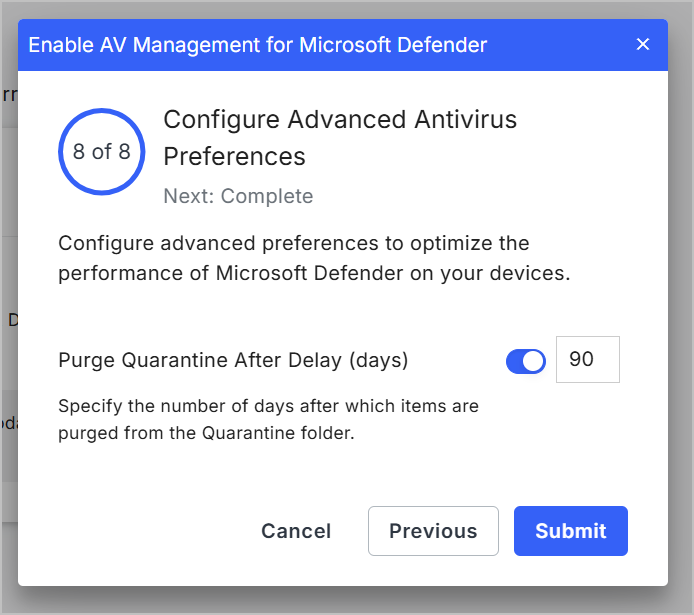
The final step allows you to adjust the feature’s Advanced Antivirus Preferences. After making your final selections, click Submit.
- Purge Quarantine After Delay (days): specifies the number of days after which items are purged from the Quarantine folder. If set to disable, the setting will be forced to zero days, meaning that malicious files will not be purged from the quarantine folder.
- NIS Definition Retirement: helps improve Microsoft Defender's performance by not checking for exploits that a device is not vulnerable to.
- NIS Protocol Recognition: enables or disables protocol recognition of known vulnerabilities for network protection.
The feature will now be enabled, and you'll be taken back its Administration page. All of the preference you set while enabling the feature will become visible and editable on this page.
Within 1-3 hours of enabling the feature, antivirus configurations will be displayed on the Endpoint Devices page. To learn more about using the feature once it's enabled, see our overview article.

Appendix: All Available Defender Configuration Options
The following Microsoft Defender configurations can be reported on, or enforced, by the endpoint agent:
| Defender Feature | Antivirus Management Options | Field Effect's Recommended Settings |
|---|---|---|
| User Interface | Headless UI: when selected, Defender's user interface and notifications are hidden on endpoint devices. Disable All Notifications: when selected, all Windows security notifications are hidden. This helps prevent end users from inadvertently performing security-related actions without your input or knowledge. | Headless UI: off Disable all Disable All Notifications: off |
| Cloud Delivered Protection | Cloud-Delivered Protection: when enabled (Basic/Advanced), malware fixes can be delivered via the cloud within minutes, instead of waiting for the next update. Automatic Sample Submissions: when enabled, Defender can send file samples to the cloud for verifying the intent of a suspicious file. Several options for this setting are available: Never Send Always Prompt Send Safe Samples Automatically Send All Samples Automatically | Cloud-Delivered Protection: Basic Automatic Sample Submissions: Send Safe Samples Automatically |
| Path, Process, and Name Exclusions | Path Exclusions: add any paths, software, or processes you want excluded Defender scans. This helps reduce false positives. | Note: by default, we prevent Field Effect's paths from being scanned by Defender. |
| Reputation-based Protections | SmartScreen: toggle whether Defender's SmartScreen feature is enabled on endpoint devices. PUA Protection: toggle whether Defender's PUA protection is enabled on endpoint devices. | SmartScreen: enabled PUA Protection: enabled |
| Scan Preferences | The following preferences are available: Scheduled Scan Type: Quick or Full Scan Time: time of day that the scan should take place. Catch-up Full Scan: start a full scan if a regularly scheduled full scan is missed) Catch-up Quick Scan: start a quick scan if a regularly scheduled quick scan is missed. Start scan while not in use: forces the update to take place when the device is not in use. Maximum CPU Utilization: percentage allocated to scans. Check for protection updates before a scan. Scan Network Files: enabled or disabled Scan Removable Drives: enabled or disabled | Type: Quick Scan Scan Time: 02:00 Catch-up Full Scan: Enabled Catch-up Quick Scan: Enabled Not In Use: Enabled Max CPU: 35% Updates before scan: Enabled Network Files: Disabled Removable Drives: Disabled |
| Signature Update Preferences | The following preferences are available: Signature update interval (hours). Signature catch-up interval (days). Update signature on Startup (on/off). | Update interval: 6 hours Catch-Up Interval: 1 day Update on Startup: Enabled |
| Advanced Antivirus Settings | Purge Quarantine Time: specify the number of days until Defender purges quarantined files. | Purge Quarantine Time: 90 days |
Was this article helpful?
That’s Great!
Thank you for your feedback
Sorry! We couldn't be helpful
Thank you for your feedback
Feedback sent
We appreciate your effort and will try to fix the article