Introduction
This article focuses on the AROs tab when set to a client view. If you are a Field Effect partner, you will have access to an organization selector that functions in the same way as the Field Effect Portal's organization selector.
This article introduces the mobile app’s AROs tab and how to navigate, sort, and filter AROs. To learn more about the concept of AROs, visit our knowledge base chapter on AROs.
The AROs Tab
The Every ARO listed on this tab (closed AROs are hidden by default) has the following metrics visible from the list view:
- ARO type (color-coded icon) and reference number.
- The ARO's creation date.
- ARO Title
- A sample of the ARO's description.
- The ARO's current status (See Getting to Know and Working with AROs for more).
- The ARO's severity. The main way we express severity is through the ARO's type, but the secondary severity level gives us a second level of granularity to help prioritize AROs of the same type.

Sorting and Filtering AROs
Tap the Filter icon in the upper right to view available filtering and sorting options. Filters highlighted in blue are currently enabled.
Tap the filters and sorting you want to use for your search and tap Apply Options to view the filtered results. You can select multiple status type filters for a search.

Drilling into an ARO
Tapping an ARO will open a more detailed view that provides everything available in the portal (excluding Compliance Mapping). To learn more about the elements of an ARO, see The Anatomy of an ARO.

Working with AROs in the Mobile App
To perform all the common interactions available for an ARO (leave a comment, create an internal note, or request help), click the Comment button at the lower right of the ARO's drilled in view (shown in the image above).
Clicking Comment will open the comment creator, and clicking the expand arrow will show all the available interactions.

Requesting Help, Creating Comments, and Leaving Internal Notes
Tapping Comment, Internal Note, or Request Help will open a text box to leave your comment or note, or send the help request. To learn more, see Working with AROs and ARO Comments & the Activity Feed.

Changing an ARO’s Status
It’s important to understand that changing an ARO’s status is permanent, and an ARO can’t be reopened once it’s been closed (Resolve or Dismiss). To learn more about AROs, see our knowledge base chapter on AROs.
You can set an ARO to one of the following statuses:
- Open: the initial status of an ARO when it is sent to your organization.
- Request Help: send us a message, which will open a support ticket so we can assist you with the ARO.
- Resolve: you have resolved the issue that triggered the ARO, and you want to receive AROs for similar issues in the future.
- Dismiss: the ARO is a false positive, and you no longer want to receive AROs about this issue.
To change the status of an ARO, drill into it and tap the Status button in the upper left of the ARO. The Change status window will open at the bottom of your screen. Select the Status you want to set the ARO to.
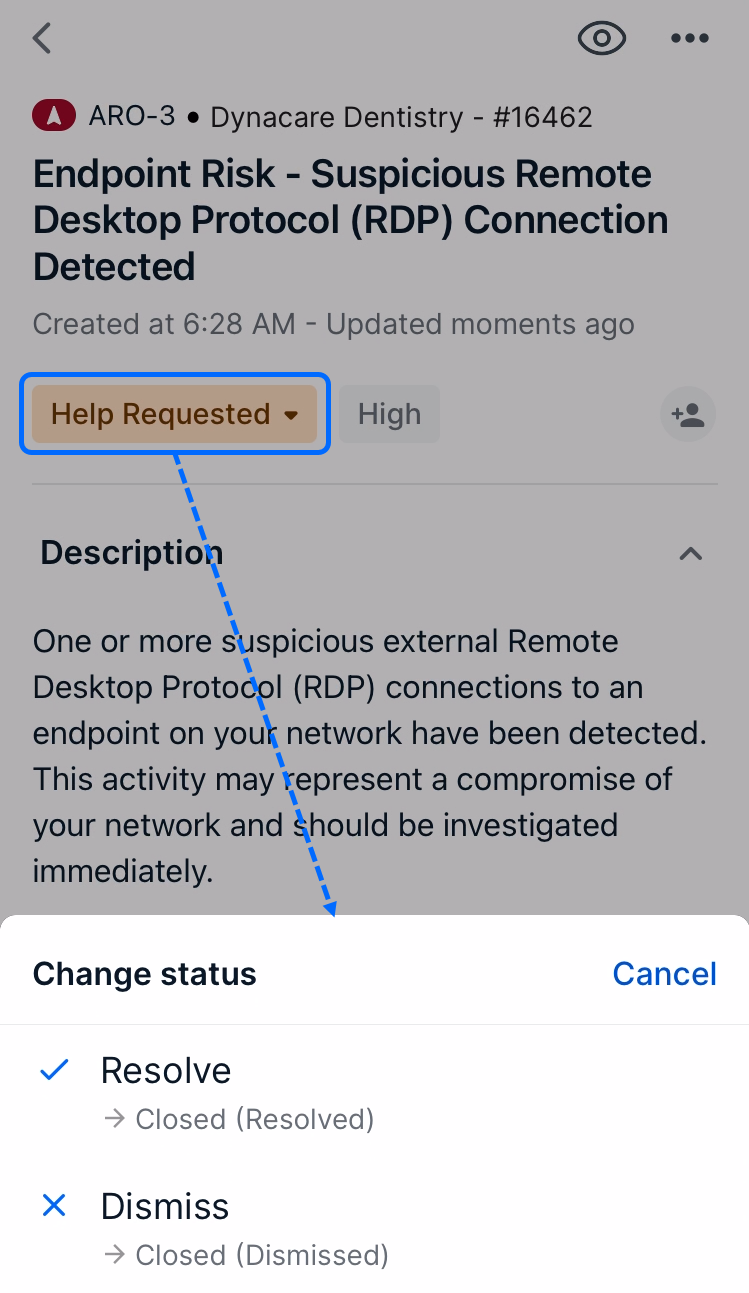
After selecting a status, a dialogue box will open. Use this to provide context around the status change. In the example below, the user is resolving an ARO, and the dialogue box is open. After providing a message, tap Send.

Assigning AROs to Team Members
Assigning AROs helps organizations split tasks and track responsibilities across multiple AROs. Multiple users can be assigned to a single ARO, and any user assigned to an ARO will automatically start watching the ARO. For more on this, see Watching & Assigning AROs.
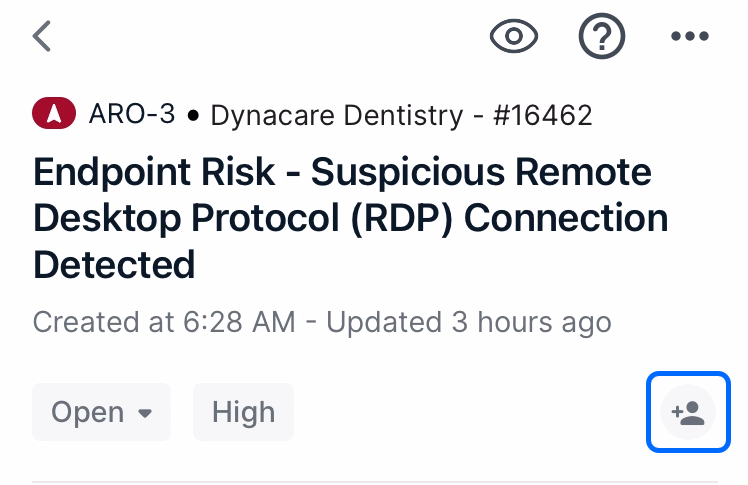
To assign a user to an ARO, drill into an ARO and tap the Assign icon.
The Change assignee window open on the bottom of the screen. Users will be listed, but you can also use the search bar to find specific users. Tap a user to assign them to the ARO.

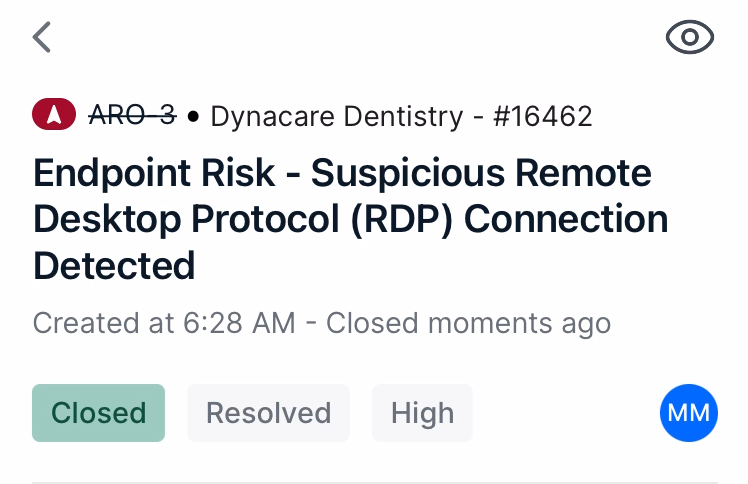
After selecting an assignee, the Assign button will be replaced with an avatar showing the user’s initials.
To learn more about assigning AROs at a more generalized level, see Watching & Assigning AROs.
Was this article helpful?
That’s Great!
Thank you for your feedback
Sorry! We couldn't be helpful
Thank you for your feedback
Feedback sent
We appreciate your effort and will try to fix the article