Introduction
This article provides a detailed outline for deploying our Compact Sensor appliance in the port mirrored configuration, complete with appliance-specific images.
The compact sensors differ from our other appliances in that it can only be assigned as a secondary appliance that relays telemetry back to your organization's primary appliance for analysis. For a more on our physical appliances, see Physical Network Appliances: Overview and Specs.
Table of contents
Notes for Compact Sensor Deployments
- Compact sensors have no pcap drive, so no data resides on the device.
- Because of this, compact appliances do not require a YubiKey and do not ship with one.
- The color-coded ports differ slightly and are outlined in the procedure below.
- If your organization has restrictive firewall policies, you may need to make exceptions in your firewall that allows for outbound connections to Field Effect’s specific domains and ports. Our Customer Success team will reach out to you if this is required. To learn more, visit Firewall Exceptions for Network Appliances and Endpoint Agents.
Deploying Compact Sensors
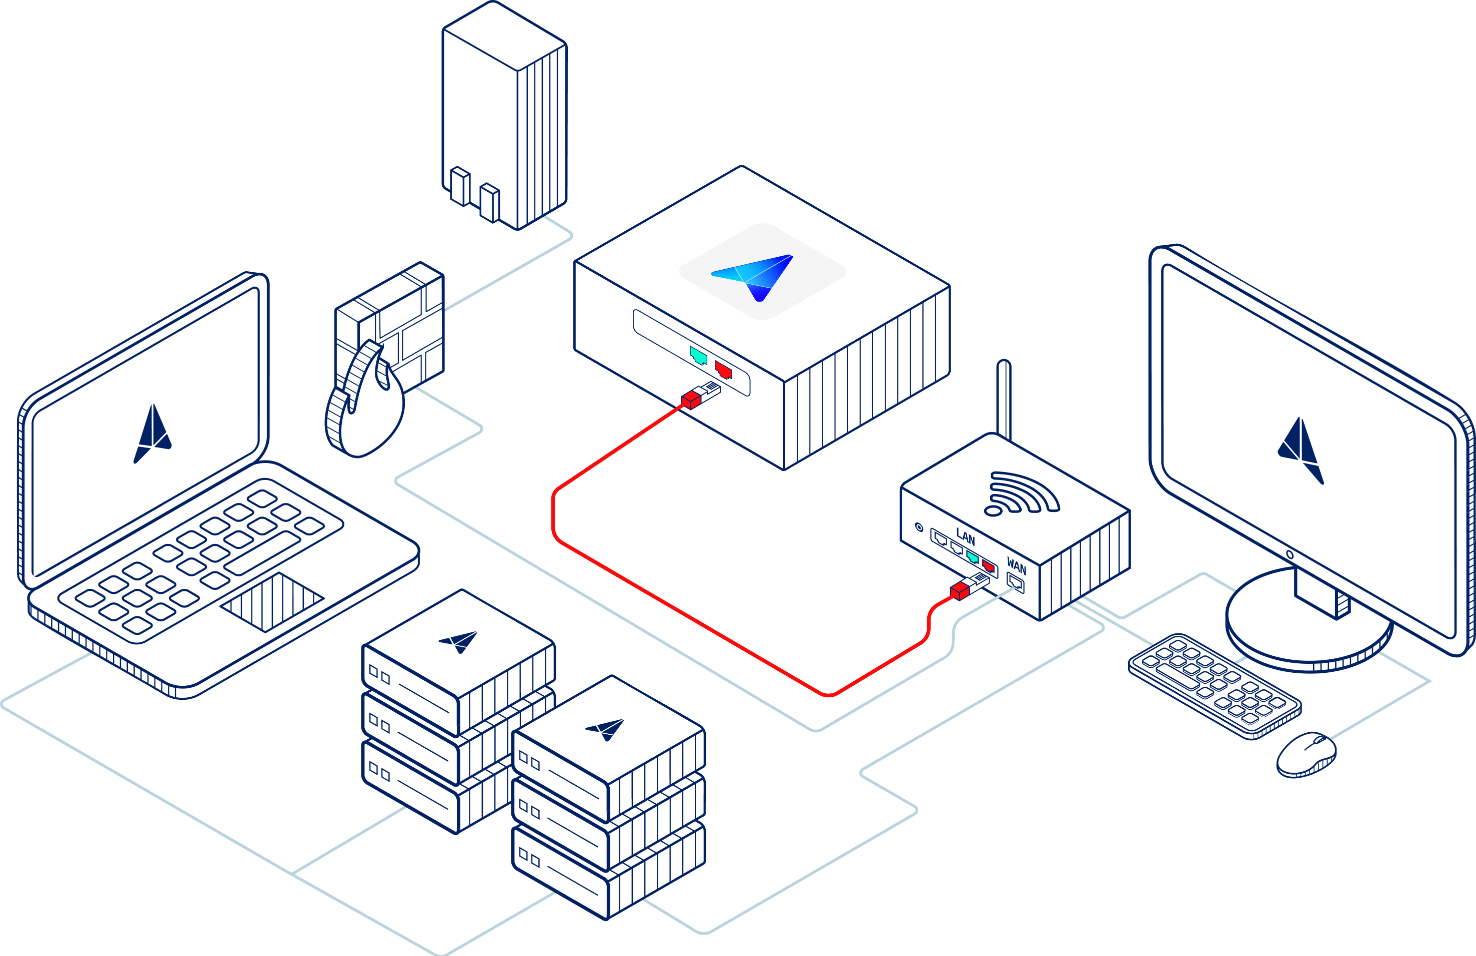
Compact sensors are deployed in the port mirrored configuration; internet traffic from your network's primary switch is mirrored to this secondary appliance and sent to the appliance for analysis. The illustration below shows a port mirrored configuration, which requires the following connections:
- Red: a 1Gbps inbound connection that sends traffic from the mirrored port to the appliance.
- Green: an outbound VPN connection used to connect to Field Effect’s data center(s).

Making the Green Connection (DHCP Lease preferred)
While we prefer a DHCP, if you require a static IP address:
After completing this guide and powering on the appliance, connect a monitor and keyboard to the appliance provide your appliance credentials, which can be found by visiting the "Finding your appliances Service tag and MAC Address" chapter within How do I access the appliance's Status page?

Once Logged in, you’ll be presented with the appliance management console, where you can configure and admin your appliance. To provide a static IP, follow procedure 1, "Configuring a Static IP Address" in the aforementioned article.
If you can provide a DHCP lease, plug one end of the green cable into any network port on your core switch with internet access.

Then connect the other end of the green cable into the GREEN port on your appliance.

From your router's management interface, create a DHCP Reservation. This allows you to assign a specific IP address to a device - based on its MAC address. Reserving an IP for the appliance will boost reliability and connectivity. The process of reserving an IP will vary based your environment, but the benefits include:
- If the appliances reboots, it will quickly reestablish a connection with Field Effect.
- You can leverage firewall rules to maintain a more reliable connection.
- It helps ensure that syslogs are being sent correctly.
To find the MAC address for the green connection (aka interface) on your appliance, navigate to your Appliance Status Page and reserve the MAC address for the green interface.

Making the Red Connection
On the device you wish to use for port mirroring (firewall or switch), configure a Switched Port Analyzer (SPAN) port and mirror all traffic to it. Plug the provided red cable into this newly configured SPAN port.
Plug the other end of the red cable into either the RED1 or RED2 port on your appliance.

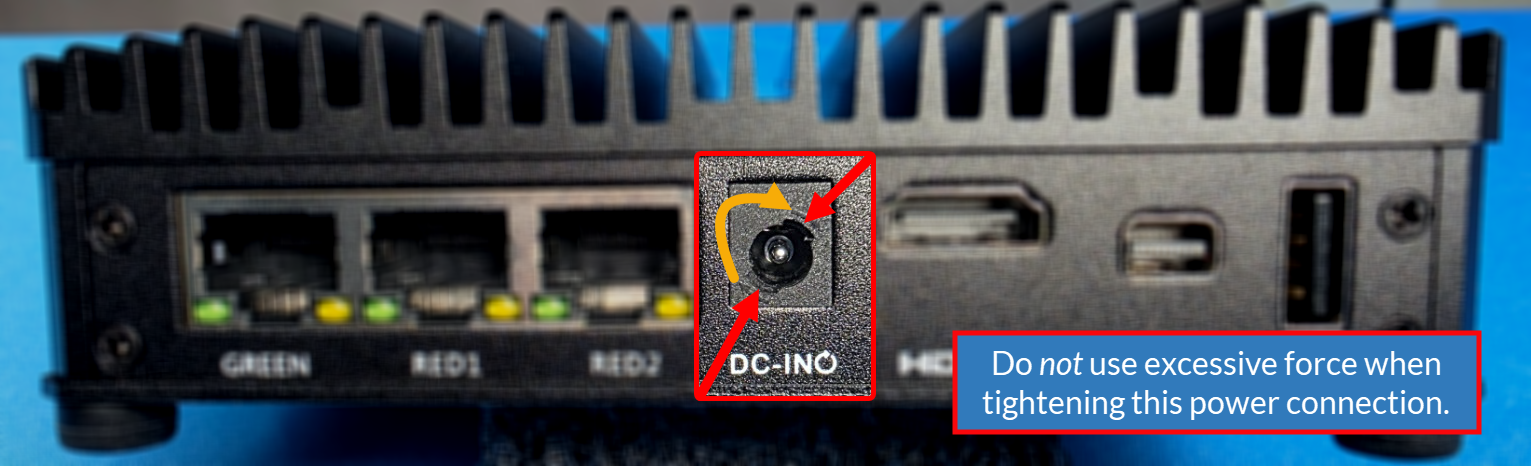
Powering the Appliance
Make sure to gently twist the barrel connector for about a quarter turn to lock it into place. Stop when you feel resistance. Failing to twist and lock the barrel connector in place may result in power issues and twisting too far with too much force can damage the connector.
Was this article helpful?
That’s Great!
Thank you for your feedback
Sorry! We couldn't be helpful
Thank you for your feedback
Feedback sent
We appreciate your effort and will try to fix the article