Introduction
NOTE: The DNS Firewall is only available to MDR Complete clients. Visit our public website to learn more about out service tiers.
Our DNS Firewall provides DNS protection to devices connected to your internal networks (on-network protection), or when connected to external networks (roaming).
Once enabled in the MDR Portal, you can restrict access to website by category (gambling, etc.) or at a per-URL level using the custom allow and block lists. A DNS Firewall dashboard is also available for deeper investigations and insights into what users are requesting and what is being blocked.
This article covers the following topics:
What is Roaming Protection?
Roaming is currently only support for devices running Windows 10 and above.
Roaming devices do not support the reporting functionality available with on-network protection. We are currently working on adding this reporting functionality for roaming devices.
When Roaming Protection is enabled, the DNS Firewall's blocking functionality extends to devices on external networks, such as a laptop connected at home, or to a public Wi-Fi hotspot.
How is Roaming Detected on a Device?
When a device connects to the internet, the endpoint agent checks whether it's already protected by your DNS Firewall. It does this by attempting to resolve a built-in test domain dns.test.cira.ca that is resolved by the on-network DNS Firewall service:
If resolution succeeds: The device is on a monitored network with DNS Firewall protection, so Roaming stays disabled.
If resolution fails: The device is on an external network. The agent enables Roaming protection and overrides the default DNS server on the host with the IP of the Roaming DNS server.
Important Exceptions
The agent handles two scenarios differently:
Servers: Roaming protection does not apply to devices identified as servers, since servers typically don't move between networks.
VPN Connections: Roaming protection is disabled while a device is connected to a VPN. The agent assumes VPN connections route through your corporate network and are already protected by your DNS Firewall. When the device disconnects from the VPN, it switches to Roaming mode.
Enabling the DNS Firewall
Please note that it may take up to 3 hours for the DNS Firewall to fully activate after you enable and configure if for your organization (or end client).
Prerequisite: add public IP addresses to the Monitoring Profile
The DNS Firewall uses your external public IP address to associate and authenticate your DNS requests. If our DNS Firewall server receives a request with a source IP that that does not match your external public IP, the request will be refused.
Before making any configuration changes, gather the public IP addresses for every external gateway device in your organization, as they need to be added to your organization's Monitoring Profile.
Once you have all your public IP addresses, navigate to the Administration section's Service Profile page. From the Monitoring Profile tab, click on the Public IPs section and add your connections as required. See The Monitoring Profile: Overview for more on setting up public IPs and connections.

Enable On-Network Protection
Partners: this page is only accessible on a per-client basis. Ensure that the Organization Selector is set to the appropriate client to access this page.
Navigate to the Administration section's DNS Firewall page and enable the On-Network Protection toggle.
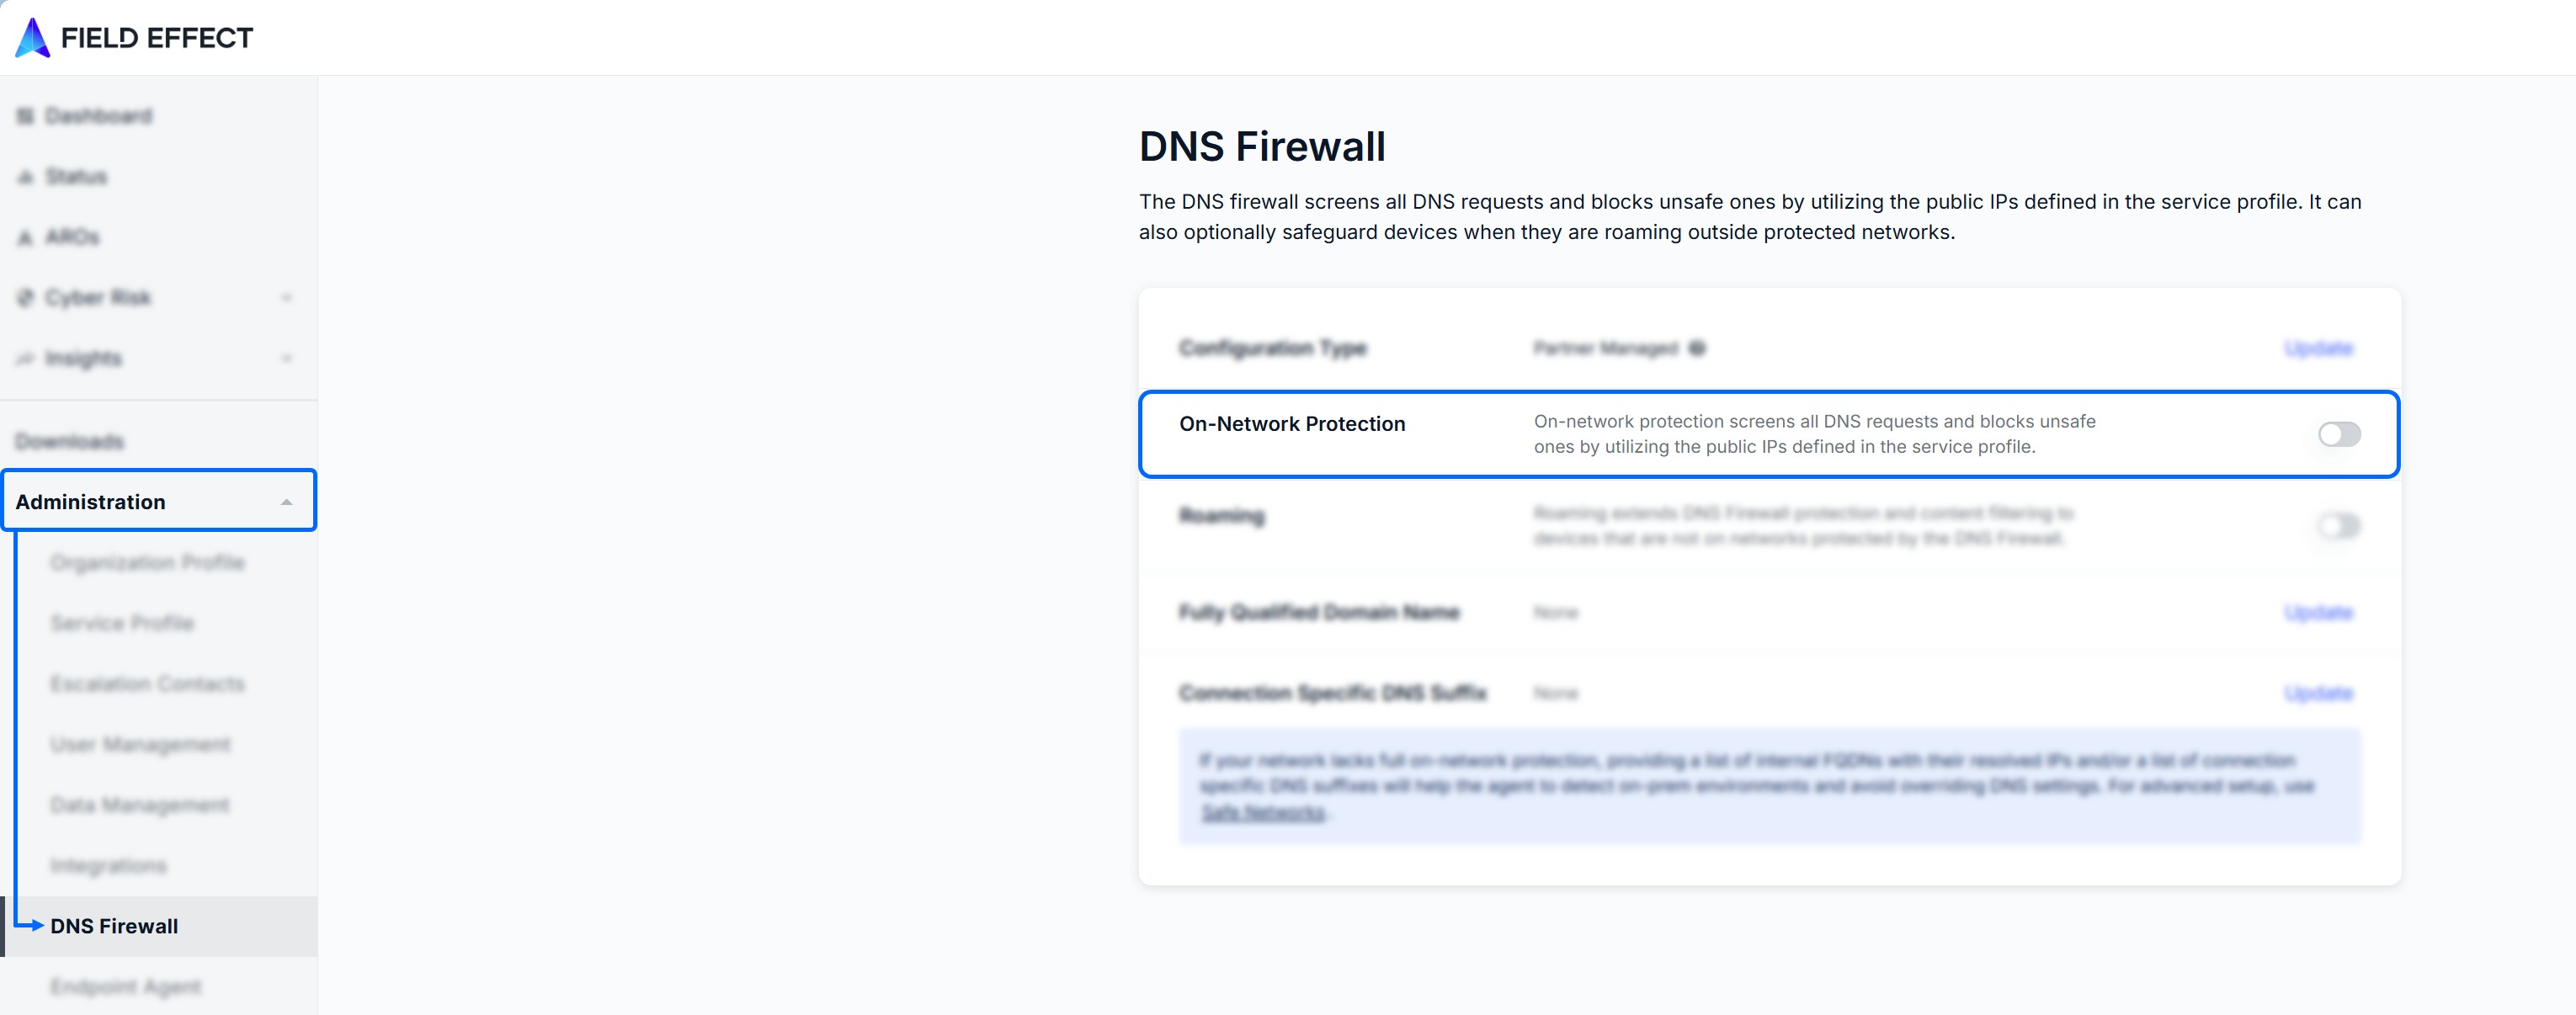
A new window will open to remind you that you must update your DNS server(s) to use our DNS nameservers instead of their defaults. When you check the confirmation box and click the Update button, your public IP address(es) will be registered for the service.
The process to update your DNS servers will vary depending on your hardware, but you must configure these addresses as DNS forwarders in your AD or gateway DNS servers:
IPv4 format:
Primary: 162.219.51.2
Secondary: 162.219.50.2
IPv6 format:
Primary: 2620:10a:8054::2
Secondary: 2620:10a:8055::2

Enabling Roaming Protection
To enable roaming protection alongside on-network protection, simply enable the Roaming toggle once the DNS Firewall's on-network protection is enabled.

Can I use roaming without On-Network protection?
If you choose not to use On‑Network protection, you’ll need to apply additional configuration to ensure your internal domains continue to resolve properly. This also applies if you plan to use another DNS filtering solution on your corporate network but still want Field Effect’s Roaming protection for devices when they’re off‑network.
Option 1- Exclusion by Fully Qualified Domain Name (FQDN)
Fully Qualified Domain Name (FQDN)
The agent uses resolution of an existing FQDN in your network to determine whether to override DNS settings on a network interface.
Configuration Steps:
Identify a reachable internal domain - Choose a domain that's accessible on your Active Directory servers (e.g., sharedrive.local)
Configure in the MDR portal - Add this FQDN and its IP address/subnet to your configuration. The agent will attempt to resolve it whenever the device connects to a new network.

How Exclusion by FQDN Works
By configuring the FQDN:
If the device can reach your Active Directory, the agent successfully resolves the FQDN and does not override DNS
If the device is on an external network, resolution fails and the agent enables Roaming protection.
Important Notes:
You only need to map one reachable internal domain—the agent doesn't require every internal domain to be configured
Alternative approach: Instead of configuring a custom FQDN, you can follow Option 2 to add dns.test.cira.ca as the last DNS record in your AD DNS servers to achieve the same result
Option 2- Exclusion by Static DNS Record
Configuration Steps
Add the following static DNS entry to your DNS server AD or gateway device(s) as the last entry in your DNS resolver list:
- Domain:
dns.test.cira.ca - IP Address:
5.5.5.5
How Exclusion by Static Entry Works
By placing this entry last in your resolver list:
Your network continues using your AD DNS server for domain name resolution
The agent detects your corporate network (because it can resolve dns.test.cira.ca via your AD) and keeps Roaming disabled
When devices connect to external networks, they fail to resolve dns.test.cira.ca, triggering Roaming protection
When devices reconnect to your corporate network, the agent detects the network again and disables Roaming
Additional Network Parameters (Optional - Advanced)
If you are an advanced user and would like to define your "safe (monitored by your organization)" networks, See Mapping Safe Networks.
Based on the configuration of your network(s), and how they are monitored, you may be required to provide additional information to enable roaming protection. You can provide the following:
Connection Specific DNS Suffix: Providing this helps us identify networks that you control and therefor do not require roaming protection.
A connection-specific DNS suffix must be assigned to a network interface so our agent can recognize the safe network assigned to that interface.
It is recommended that you configure the connection-specific suffix on a Windows client via DHCP.
An “ipconfig /all” command will confirm that the suffix is assigned as required.
Connection Specific DNS Suffix
Simply provide your suffix in the text field and click Add +. Added suffixes will be listed below. Once you add all your suffixes, click Update to confirm, and return to the DNS Firewall administration page.
Was this article helpful?
That’s Great!
Thank you for your feedback
Sorry! We couldn't be helpful
Thank you for your feedback
Feedback sent
We appreciate your effort and will try to fix the article