Introduction
Escalation Contacts, which can be assigned in the MDR Portal, help ensure that Field Effect knows who to contact in the event of a security incident.
Each user being assigned as an escalation contact must have access to corporate resources and the ability to manipulate them. Example procedures include disabling corporate VPNs or isolating hosts (without using the Field Effect endpoint agent).
This article walks through the process of adding and editing escalations contacts.
Escalation Contacts for Partners
If you are a Field Effect Partner, you can assign escalation contacts at either the client or the partner level, depending on how your organization selector is set.
Partner Level:
When adding an escalation contact at the partner level, they will be available for client organizations as a contact, in addition to any escalation contacts added at the client level. See Viewing Escalation Contacts below for more.
Client Level:
When adding an escalation contact at the client level, that contact will only be associated with that single client organization.

Adding Escalation Contacts
To begin, click Add Contact. A new window will appear on your screen. From here, you can either browse for existing users that already belong to your organization, or add a new user to the organization, and as an escalation contact.
Adding an Existing User
If you have already deployed Field Effect MDR, some users should have already been added into the organization. They will be available in the search bar shown in the Add Contact window. Search for any existing user and click their name and click Next.
If you are a Field Effect partner and you have created escalation contacts at the partner level, they will be available in this search bar.

Once the existing user is selected, provide some extra details about the user, along with notes that are relevant to our Support team in the event of a security incident. Once complete, click Submit and the new user will be listed as an escalation contact.
Adding a New User
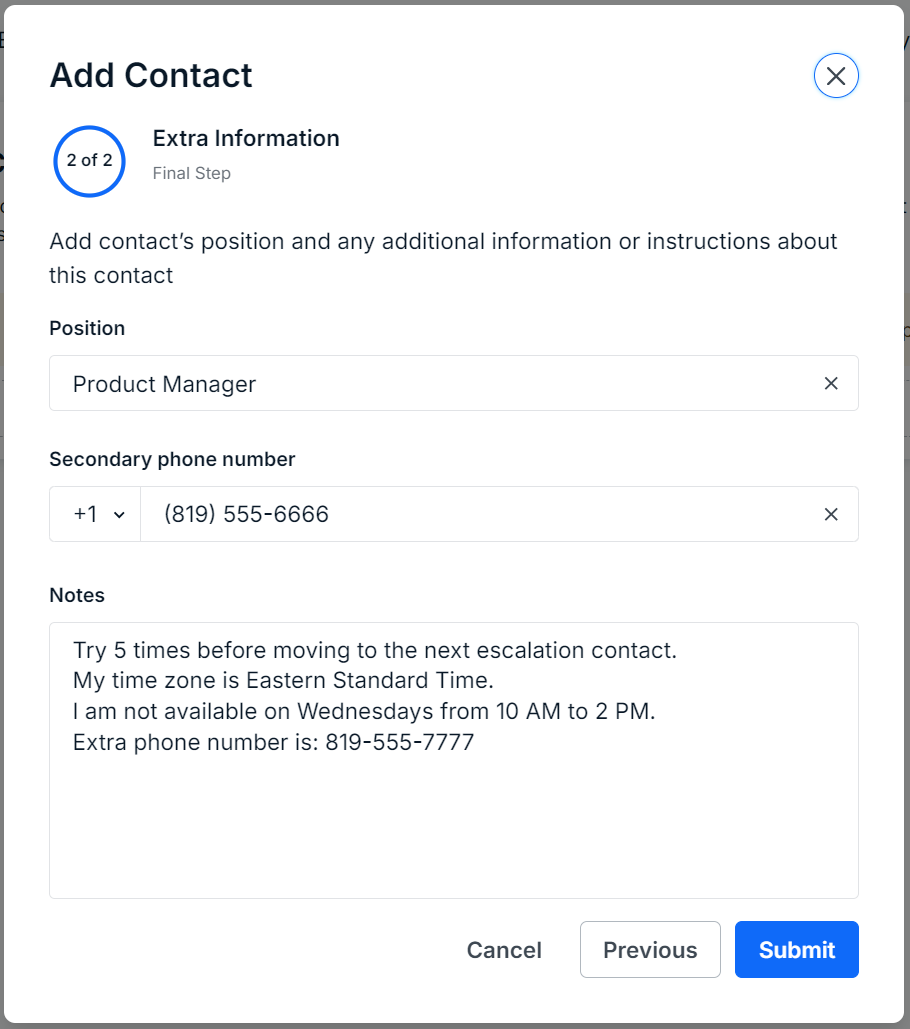
If you would like to add a user that has not yet been invited to the Field Effect MDR Portal, begin by selecting Enter contact Manually and providing their contact details. Once complete, click Next.

For the final step, provide some extra notes that are relevant to our Support team in the event of a security incident. Once complete, click Submit and the new user will be listed as an escalation contact.

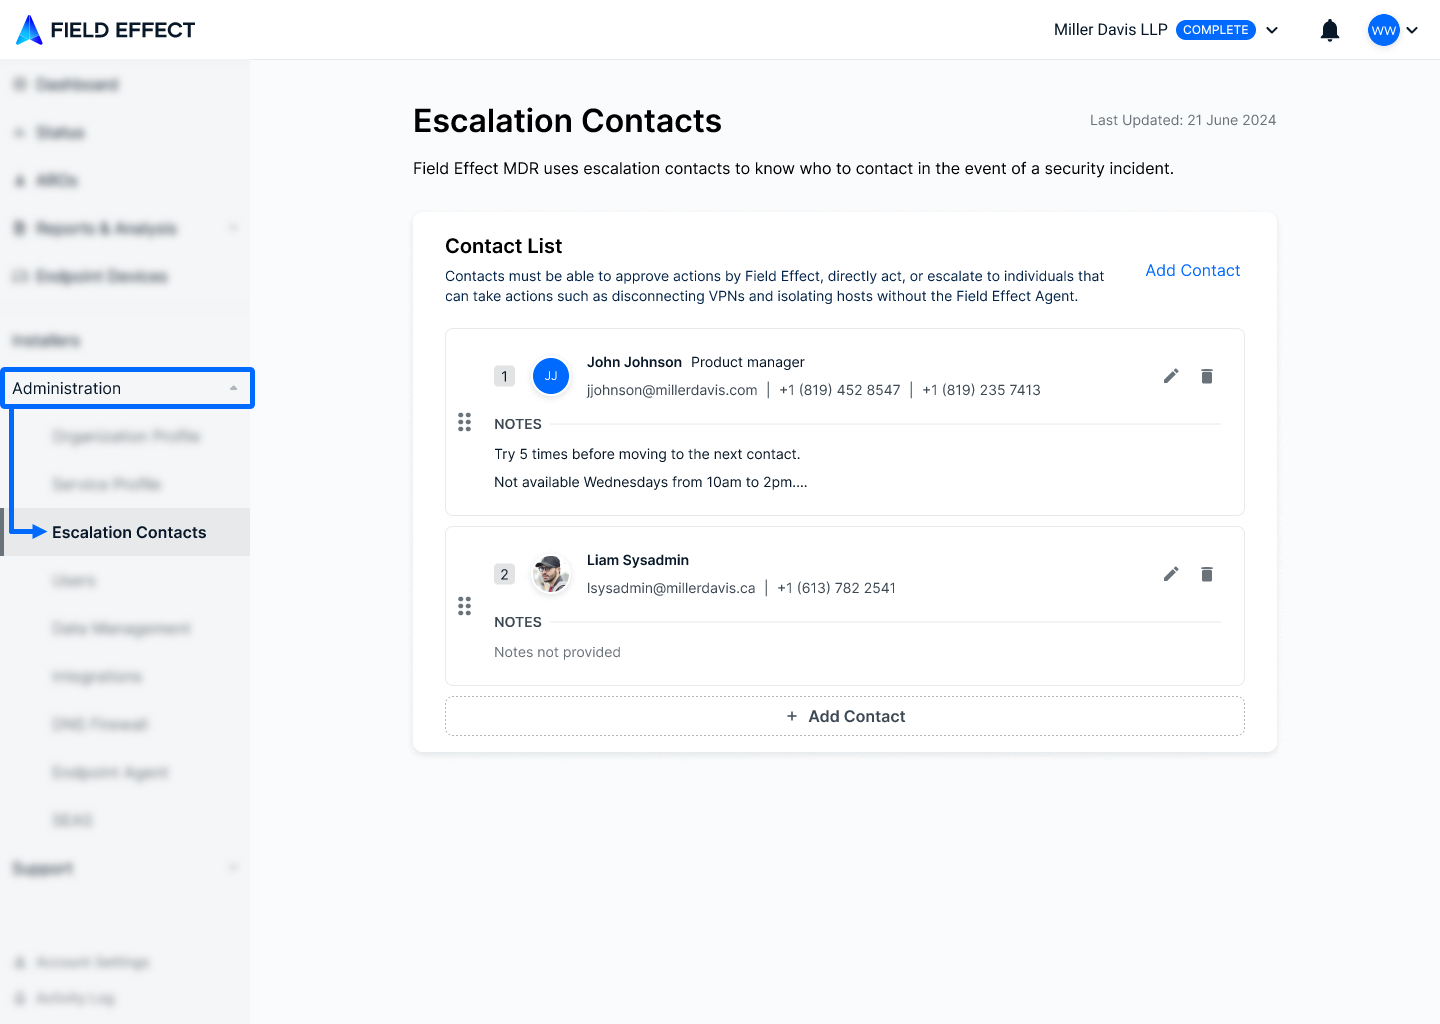
Managing Escalation Contacts
Once you have added some escalation contacts, simply drag your contacts using the move handle to communicate their priority. We will reach out the number one contact first and move down the list, taking into account any notes about the escalation contact.
To edit an escalation contact's details and notes, click the Pencil icon in the contact's entry. Clicking on this icon will take you back to the wizard shown above. As you navigate through the wizard, make your escalation contact updates and click Submit at the end of the wizard.
To remove a contact entirely, click the trash can icon.

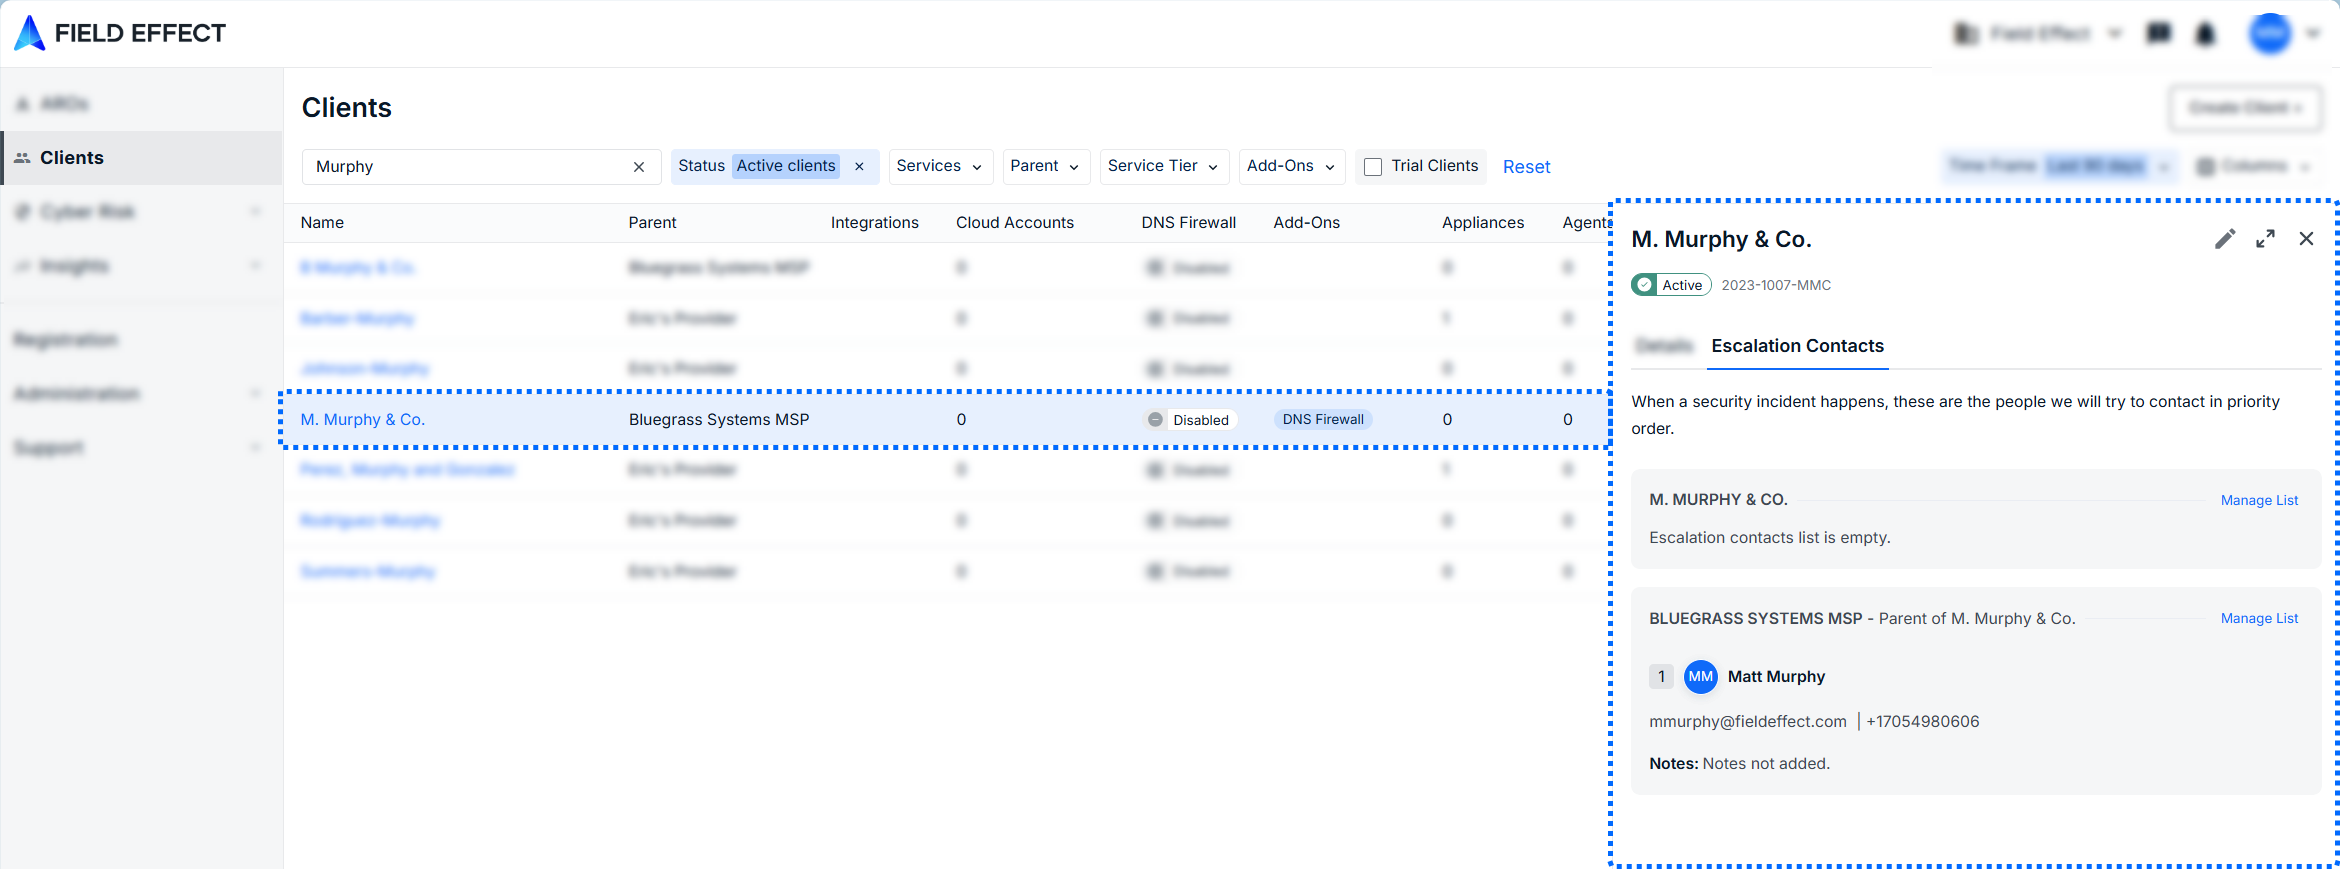
Viewing a Client's Escalation Contacts
To see whether a client is using client-specific contacts, escalation contacts, or both, drill into the client from the Clients page and open and open their Escalation Contacts tab.
In the example below, the client M Murphy & co. has no contacts at the client level, but the MSP partner contacts are shown. In this scenario, the provided partner contact would be the main point of contact.
In the next example, the client B Murphy & Co. has their own escalation contact, and the MSP as provided their own contact information. In this scenario Field Effect would reach out to the client contact (1) first and then move on to the partner-level contact (2).

Was this article helpful?
That’s Great!
Thank you for your feedback
Sorry! We couldn't be helpful
Thank you for your feedback
Feedback sent
We appreciate your effort and will try to fix the article