Introduction
Reference: Using Packet Mirroring | VPC | Google Cloud
Recommended: add a {Field Effect MDR: id} label to each resource for organizational purposes especially when performing multiple deployments.
Create a Field Effect MDR Virtual Appliance
Login to the Cloud Platform (GCP) console and navigate to VM Instances within the sidebar’s Compute Engine section.

From the VM Instances page, click Create Instance in either the center of the page or at the top of the page.

You’ll be taken to the Create Instance page.
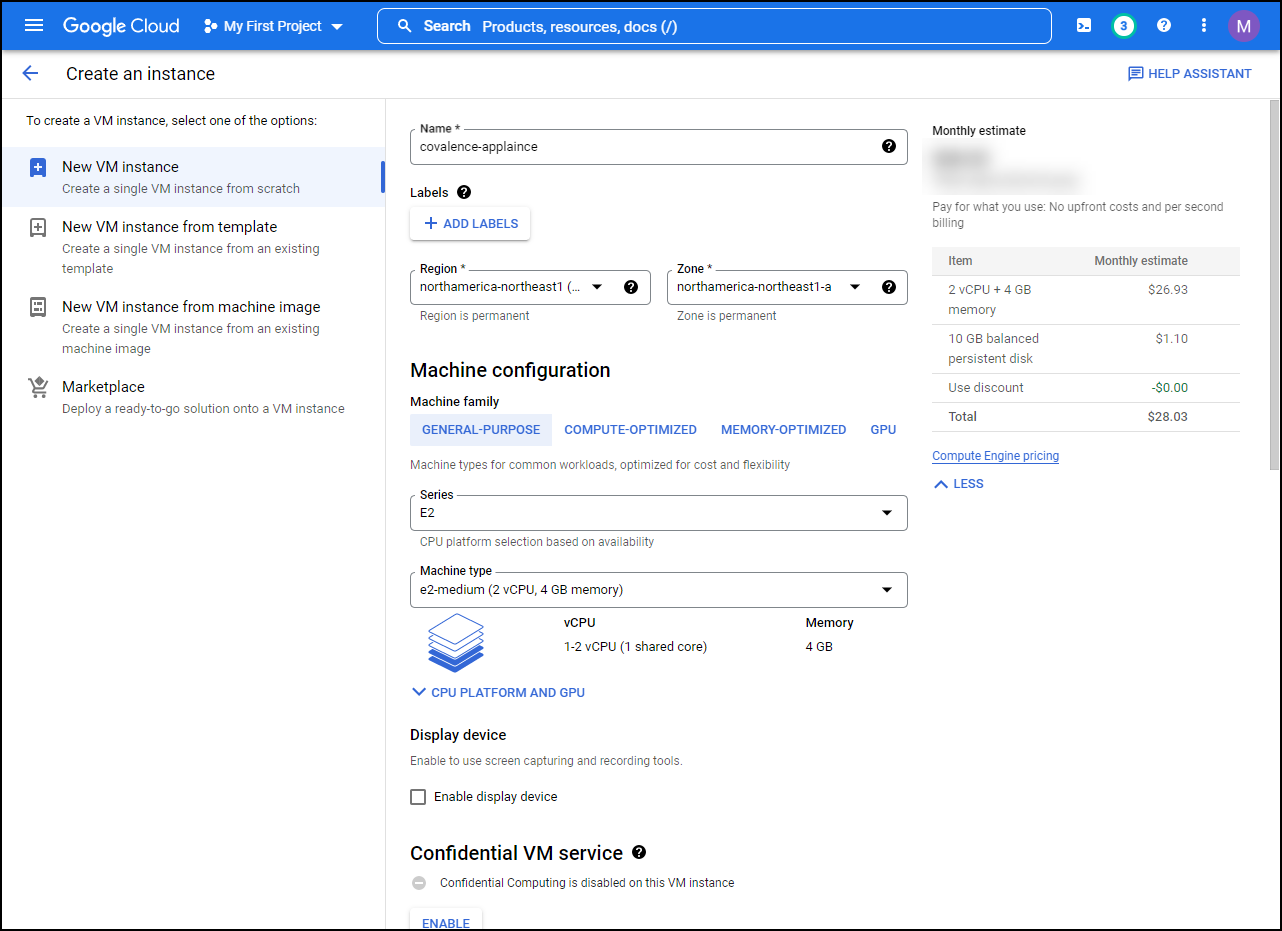
Name the new VM instance “Field Effect MDR-appliance” and select the region that suits your needs.
Note: we recommend labelling each appliance instance for clarity, especially if you are deploying multiple virtual appliances in Google Cloud Platform. Examples of labels include “Field Effect MDR: headquarters” and “field-effect : remote”. See the . Google Cloud Platform Blog for more.

For the Machine configuration section, set the Series field to E2 and the Machine type field to e2-highmem-4.

In the Boot disk area, click CHANGE.

The Boot disk edit pane will open. In the PUBLIC IMAGES tab, set the boot disk to the following settings, depending on the type of appliance you are creating (primary or remote) and click SELECT:
If creating a primary appliance:
- Operating system: Ubuntu
- Version: 20.04 LTS
- Boot disk type: Balanced persistence disk
- Size: 1500GB
- If you are creating a remote appliance for a branch office, 1000GB is acceptable

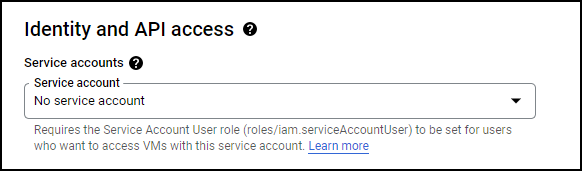
You’ll be taken back to the Create instance page. In the Identity and API section, set the service account field to no service account.
In the Management section’s Metadata subsection (Expand Advanced opens to access this section), click +ADD ITEM. In the key field, type “user-data” and paste the contents of the cloud init file Field Effect provided for your organization.

Scroll to the bottom of the page and click CREATE to create the new instance.

You’ll be taken back to the VM Instances page and the new VM for your virtual network appliance will be listed.

Configure an Instance Group for Field Effect MDR
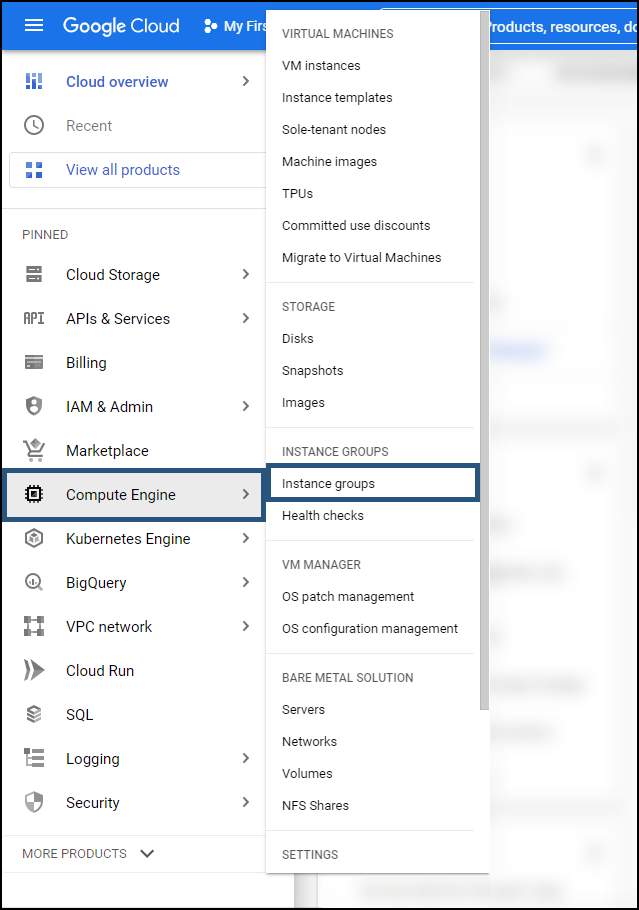
From the Cloud Platform (GCP) console, navigate to Instance Groups within the sidebar’s Compute Engine section.
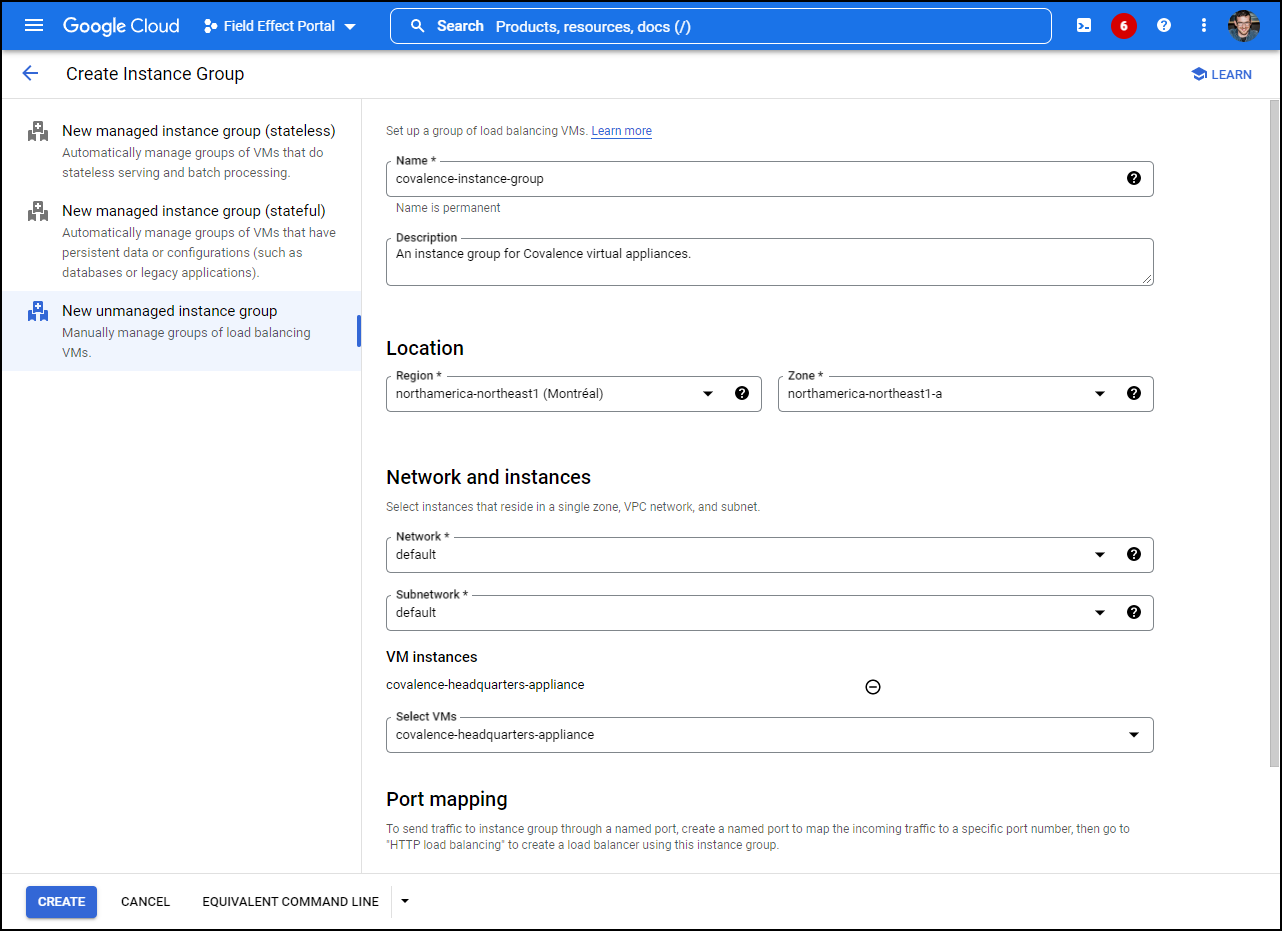
From the Instance Groups page, click CREATE INSTANCE GROUP.

In the lefthand panel, select New unnamed instance group. Set the following parameters for the instance group:
- Name: field-effect-instance-group
- Description (optional): An instance group for virtual appliances.
- Region: same as the newly created instance (above)
- Network: select your Virtual Private Cloud (VPC)
- Subnetwork: default
- Select VMs: choose all of the VMs that represent a Field Effect MDR virtual appliance (primary and/or remote)
After configuring the group to the parameters above, click CREATE in the lower left.
Configure Traffic Mirroring
The following sections show you how to set up traffic mirroring for a virtual appliance in the Google Cloud Platform.
Configure a TCP Load Balancer
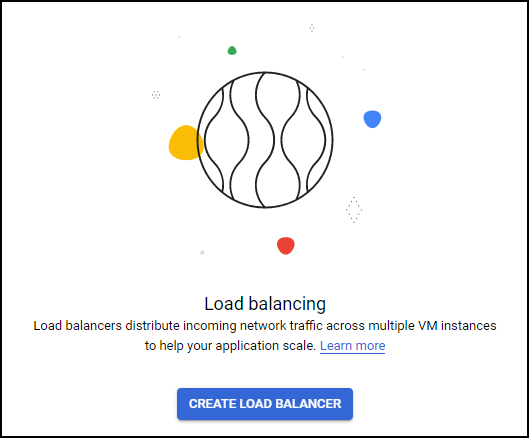
From the Cloud Platform (GCP) console, navigate to Load balancing within the sidebar’s Network services section.
Note: you may need to click “More Products” at the bottom of the sidebar to access to Networking services section.

From the Load balancing page, click CREATE LOAD BALANCER.
Within the TCP Load Balancing card, click START CONFIGURTATION.

On the next page, set the following parameters:
- Internet facing or internal only: Only between my VMs
- Multiple Regions or single region: Single region only
- Load Balancer type: Pass-through
After setting the parameters as shown above, click CONTINUE.

On the left panel of the next page, set the following parameters:
- Name: field-effect-tcp-lb
- Region: the region that applies to your organization
- Network: default
After setting the parameters as listed above, click Backend configuration. This will the configuration settings for backend of the new load balancer in the right-hand pane.

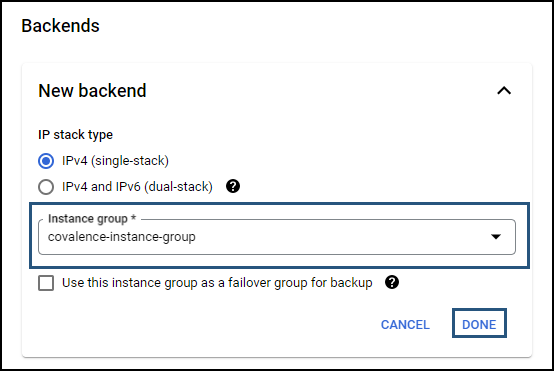
In the Backend configuration section on the right, set the IP Stack type to IPv4, set the instance group to the instance group you previously created (outlined above) and click DONE.
In the health check field, expand the selection menu and click CREATE NEW HEALTH CHECK.

The Create Health Check flyout pane will appear. Set your new health check to the following parameters:
- Name: ip-healthcheck
- Description (optional): “Health check for the Field Effect load balancer.”
- Scope: Regional
- Protocol: TCP
- Port: 22
- Proxy protocol: NONE
- Request: leave empty
- Response: leave empty
- Logs: off
- Check interval: 300 seconds
- Timeout: 5 seconds
- Healthy threshold: 2 consecutive successes
- Unhealthy threshold: 3 consecutive failures
After setting the parameters to the above, click SAVE.

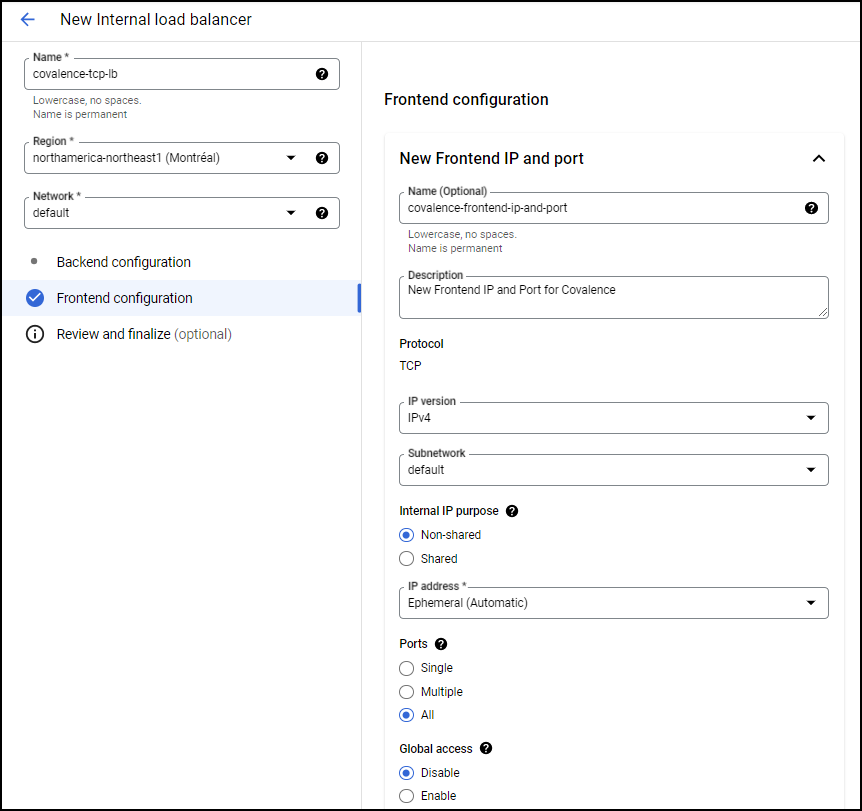
From the left panel of the New TCP load balancer page, click Frontend configuration.

For the Frontend configuration, set the following parameters:
- Name: field-effect-frontend-ip-and-port
- Description (optional): “New Frontend IP and Port for Field Effect MDR.”
- IP version: IPv4
- Subnetwork: default
- Internal IP purpose: non-shared
- IP address: ephemeral (Automatic)
- Ports: All
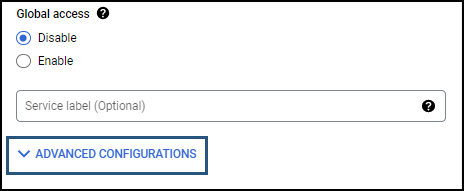
- Global access: Disable
After setting the parameters as listed above, expand the ADVANCED CONFIGURATION section.

In the ADVANCED CONFIGURATION section, check the “Enable this load balancer for Packet Mirroring” checkbox and click DONE. You’ll be taken back to the New Internal load balancer page.

You’ll be taken back to the New Internal load balancer page. Click Review and Finalize and verify your configuration. When satisfied, click SAVE.

You’ll be taken back to the Load Balancing page, and the new TCP load balancer will be shown on the page.

Configure a UDP Load Balancer
From the Cloud Platform (GCP) console, navigate to Load balancing within the sidebar’s Network services section.
Note: you may need to click “More Products” at the bottom of the sidebar to access to Networking services section.

From the Load Balancing page, click + Create Load Balancer.

From the Create a load balancer page, click STAERT CONFIGURATION.
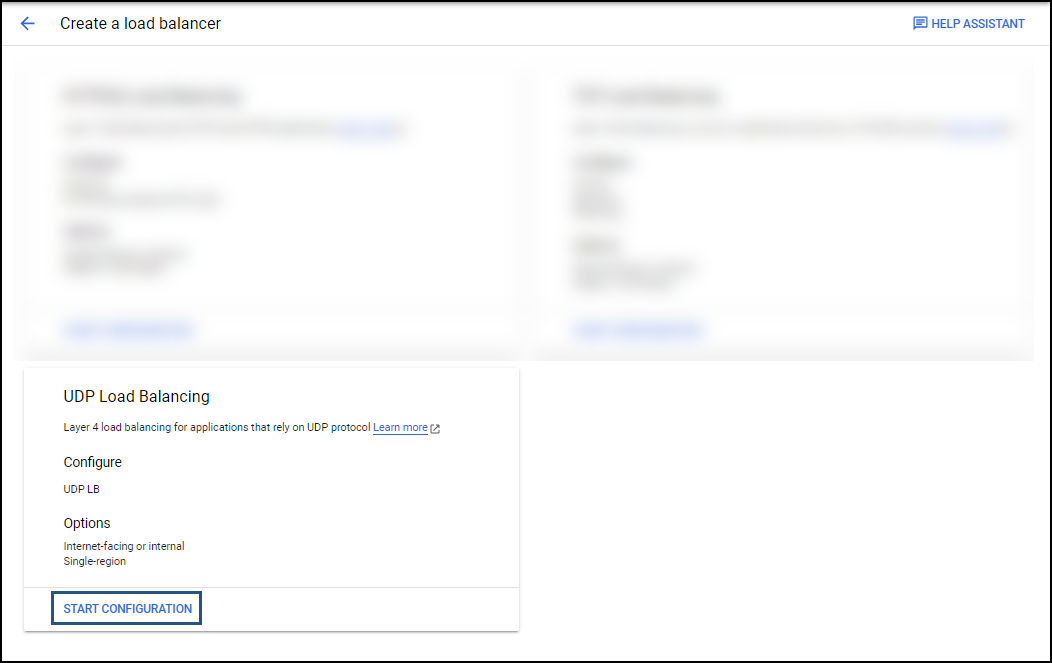
On the next page, set “Internet facing or internal only” to Only between my VMs and click CONTINUE.

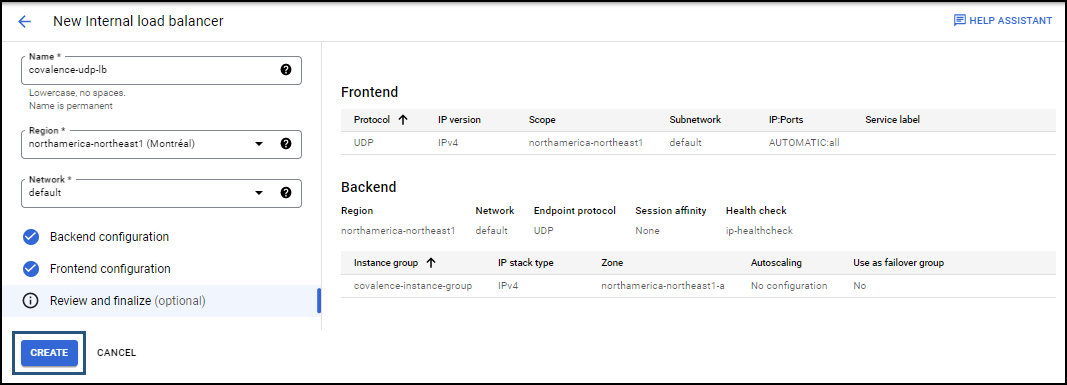
On the left panel of the New Internal load balancer page, set the following parameters:
- Name: field-effect-tcp-lb
- Region: the region that applies to your organization
- Network: default
After setting the parameters as listed above, click Backend configuration. This will ensure the configuration settings for the backend of the new load balancer are visible in the right-hand pane.

In the Backend configuration section on the right, set the IP Stack type to IPv4, set the instance group to the instance group you previously created (outlined above) and click DONE.

In the Health check field, select the health check (ip-healthcheck) we created while setting up the TCP load balancer.

From the left panel of the New TCP load balancer page, click Frontend configuration. This will make the frontend configuration setting visible in the right-hand pane.

For the Frontend configuration, set the following parameters:
- Name: field-effect-frontend-ip-and-port-udp
- Description (optional): “New Frontend IP and Port for Field Effect MDR.”
- IP version: IPv4
- Subnetwork: default
- Internal IP purpose: non-shared
- IP address: ephemeral (Automatic)
- Ports: All
- Global access: Disable

After setting the parameters as listed above, expand the ADVANCED CONFIGURATION section.
In the ADVANCED CONFIGURATION section, check the “Enable this load balancer for Packet Mirroring” checkbox and click DONE. You’ll be taken back to the New Internal load balancer page.

You’ll be taken back to the New Internal load balancer page. Click Review and Finalize and verify your configuration. When satisfied, click SAVE.
You’ll be taken back to the Load Balancing page, and the new TCP load balancer will be shown on the page.

Configure the Mirroring Policy for the TCP Load Balancer
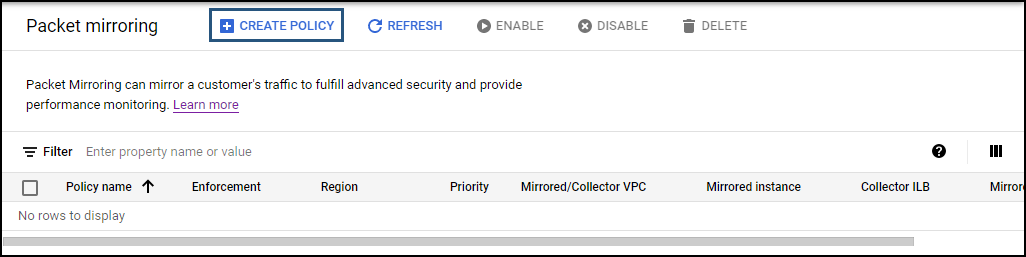
From the Cloud Platform (GCP) console, navigate to Packet Mirroring within the sidebar’s VPC Network section.

At the top of the page, click CREATE POLICY.

For the first step, Define Policy Overview, give the policy a name (“field-effect-packet-mirroring-policy-tcp”), set the region that applies to you, and set the policy enforcement to Enabled. When satisfied, click CONTINUE.

On the next step, Select VPCX Network, set “Mirrored source and collector destination are in the same VPC network” to Default and click CONTINUE.

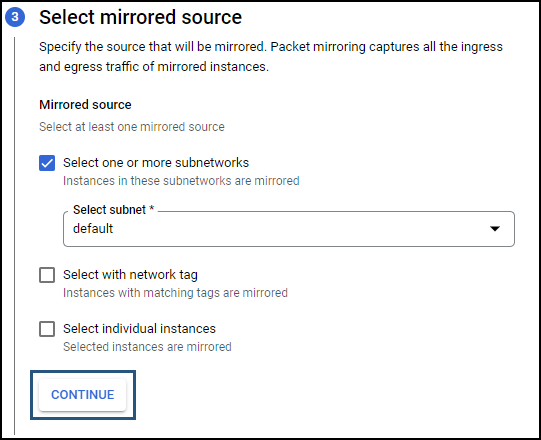
On the next step, Select Mirrored Source, select either your subnet (“default”) or select the individual instances you want to mirror. When satisfied, click CONTINUE.
For the next step, Select Collector Destination, select the Field Effect TCP load balancer you created earlier (outlined above). When satisfied, click CONTINUE.

For the final step, select mirrored traffic, select Mirror all traffic (default). When satisfied, click SUBMIT.

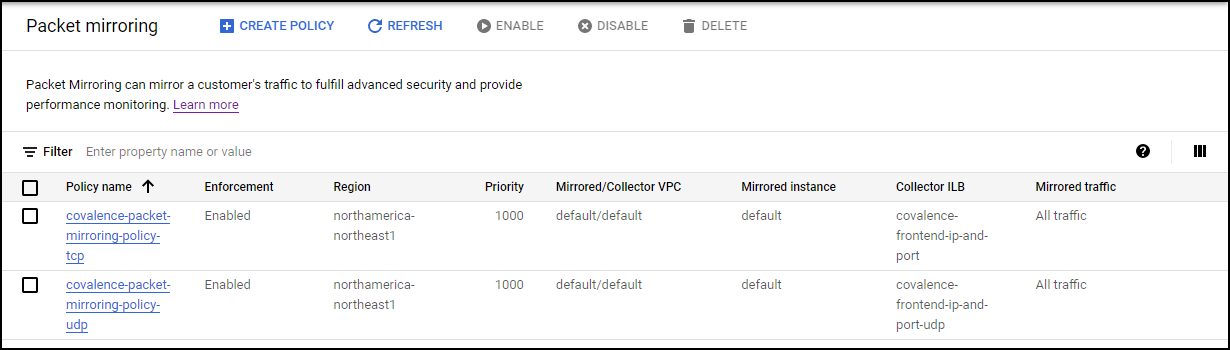
You’ll be taken back to the Packet Mirroring page, and the new policy will be listed.

Configure the Mirroring Policy for the UDP Load Balancer
From the Cloud Platform (GCP) console, navigate to Packet Mirroring within the sidebar’s VPC Network section.

At the top of the page, click CREATE POLICY.
For the first step, Define Policy Overview, give the policy a name (“field-effect-packet-mirroring-policy-udp”), set the region that applies to you, and set the policy enforcement to Enabled. When satisfied, click CONTINUE.

On the next step, Select VPCX Network, set “Mirrored source and collector destination are in the same VPC network” to Default and click CONTINUE.

On the next step, Select Mirrored Source, select either your subnet (“default”) or select the individual instances you want to mirror. When satisfied, click CONTINUE.

For the next step, Select Collector Destination, select the Field Effect MDR TCP load balancer you created earlier (outlined above).
When satisfied, click CONTINUE.

For the final step, select mirrored traffic, select Mirror all traffic (default). When satisfied, click SUBMIT.

You’ll be taken back to the Packet Mirroring page, and the new policy will be listed.
Was this article helpful?
That’s Great!
Thank you for your feedback
Sorry! We couldn't be helpful
Thank you for your feedback
Feedback sent
We appreciate your effort and will try to fix the article