Introduction
Partners: Ensure that the Organization Selector is set to the appropriate client before continuing.
This article outlines how to access your organization’s Monitoring Profile and edit each parameter.
To learn more about why the Monitoring Profile is important and how Field Effect leverages this information to understand your organizational structure and contextualize and characterize your assets when detecting threats visit Monitoring Profile: Overview.
Table of contents
- Video - The Monitoring Profile
- Where to find the Monitoring Profile
- Editing Your Monitoring Profile
- Adding/Editing Domains
- Adding/Editing Email Domains
- Adding/Editing Public IPs
- Adding/Editing Staff Locations
Video - The Monitoring Profile
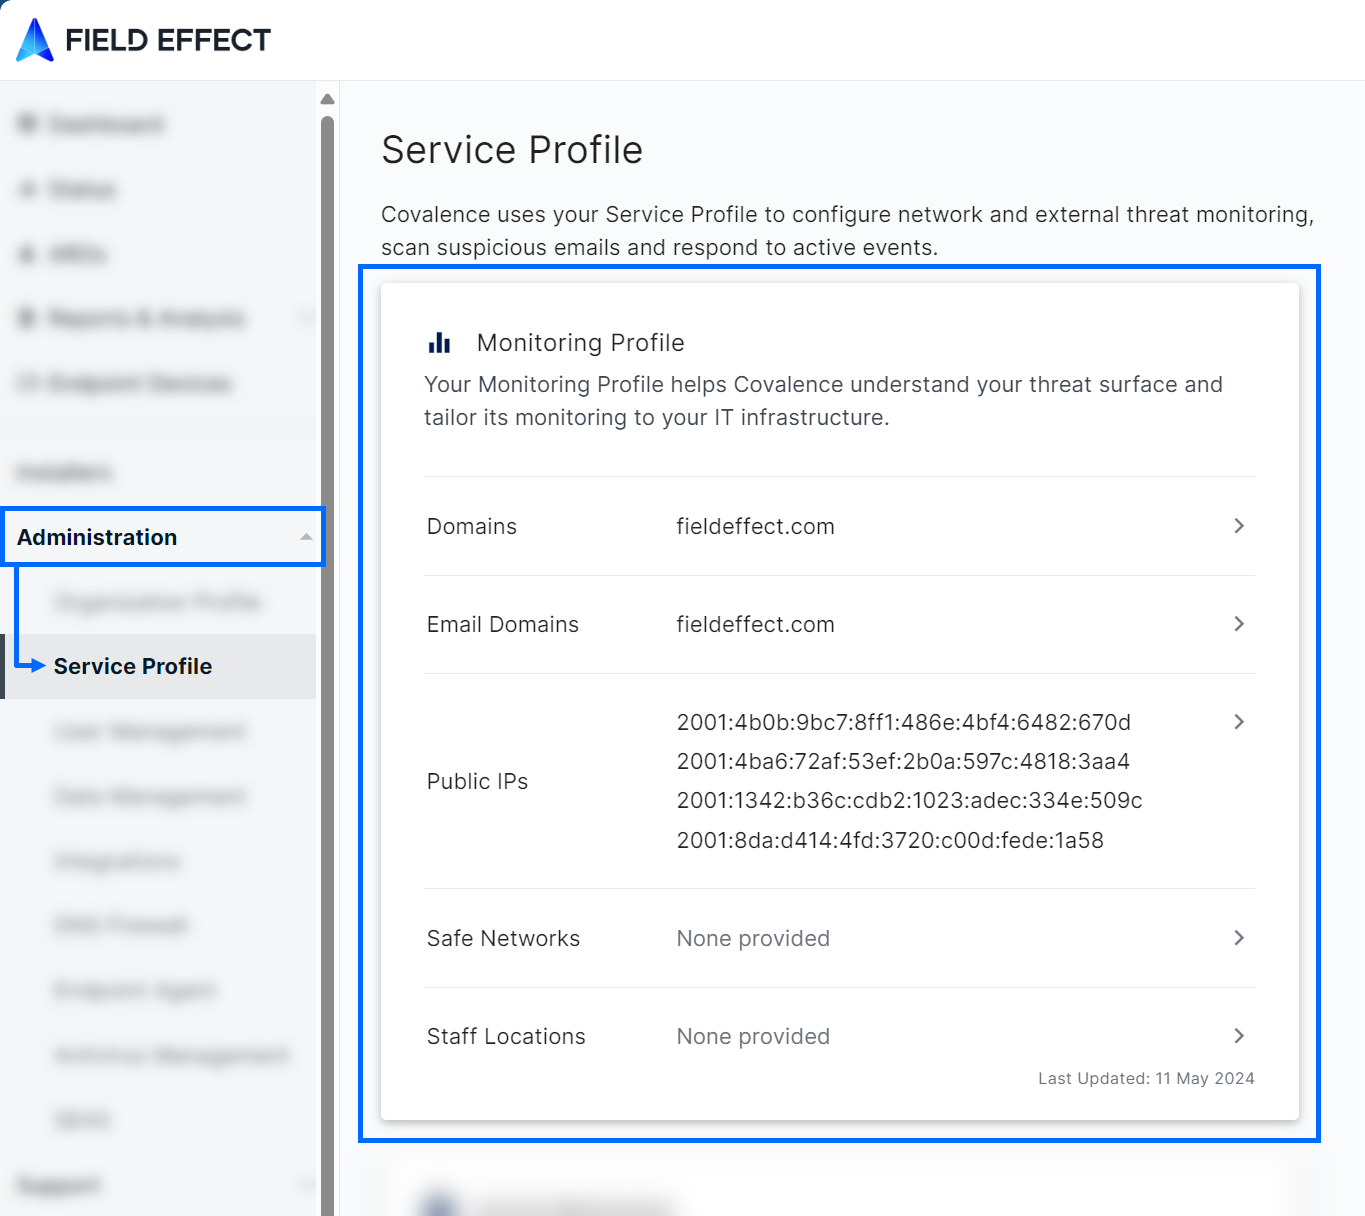
Where to find the Monitoring Profile
The Monitoring Profile can be found on the Service Profile page in the Field Effect MDR Portal.
Editing Your Monitoring Profile
To edit a section of your monitoring profile, click on the parameter you want to edit.
Adding/Editing Domains
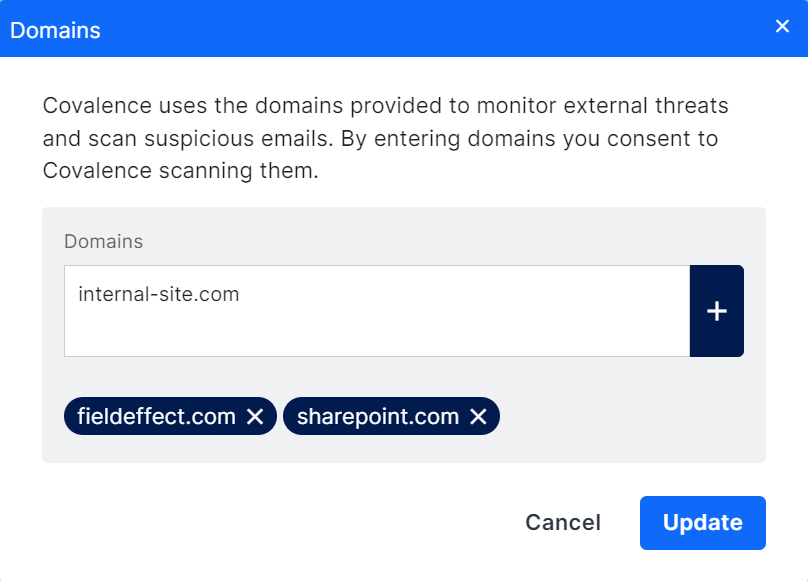
Click Domains to manage your domains. A window will appear on your screen allowing you to add or remove domains.
Adding a Domain
Type your organizational domains into the Domains field. You can add several at the same time delimiting them with a comma.
Click + to add the domains to the profile.
Editing a Domain
Previously added domains are listed as blue “pills.”

If you want to remove an existing domain, click the X within the pill.
Saving your changes
Once you've managed all your domains, click Update
Adding/Editing Email Domains
You can only add Email Domains that have already been added as a Domain first.
Click Email Domains to manage your Email Domains. A window will appear on your screen.

Adding an Email Domain
Type your organizational email domains into the Email Domains field. You can add several at the same time delimiting them with a comma.
Click + to add the domains to the profile.
Editing an Email Domain
Previously added domains are listed as blue “pills.”

If you want to remove an existing domain, click the X within its pill.
Saving your changes
Once you've managed all your domains, click Update.
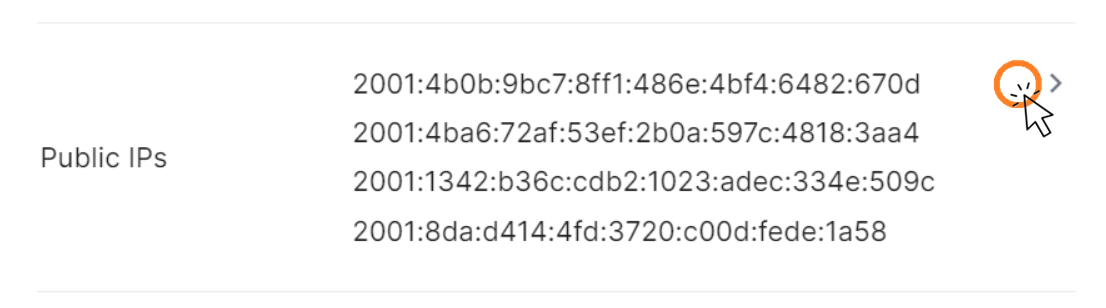
Adding/Editing Public IPs
Click Public IPs to manage your Public IPs. The Public IPs window will appear on your screen.

Public IPs can be grouped by location, and the page is laid out with a column to show your groups and management pane where you can add and remove Public IPs.
Adding a New connection
A Connection represents a group of devices at a single physical location. A simple example would be all of the computers in the same office space.
To setup a new connection click the New connection button.

A blank connection will be created and a screen will appear where you can provide your connection a name to represent the location and the Public IPs for that location.

Enter your Public IP addresses for that connector in the Public IP Addresses text box. You can add several at the same time by delimiting them with a comma.
Click + to add the Public IPs to the connection.
Editing an existing Connection
Click on a specific connection to open a window through which you can make alterations to your connection.

Adding a new Public IP address
Enter an additional Public IP addresses in the Public IP Addresses text box. You can add several at the same time by delimiting them with a comma.
Click + to add the Public IPs to the connection.
Removing a Public IP address
Each Public IP address in your connection will have its own entry showing the Public IP, its Status and an option to remove a Public IP.
Under the Action column click X to remove the Public IP
Saving your changes
Save changes to your connections by clicking Update
Adding/Editing Staff Locations
Click Staff Locations to setup the countries in which you have locations. The Staff Locations window will appear on your screen.

Adding a Staff Location
Start typing the first few letters of the country and a drop down will appear from which you can select your country.

When you select the country it will appear as a blue pill.

Removing a Staff Location
If you want to remove an existing location, click the X within its pill.
Saving your changes
After adding all your domains, click UPDATE.
Was this article helpful?
That’s Great!
Thank you for your feedback
Sorry! We couldn't be helpful
Thank you for your feedback
Feedback sent
We appreciate your effort and will try to fix the article