Introduction
If Active Response triggers a response action on an endpoint device, a desktop notification will be generated for the end user. These notifications can be customized or disabled, and this article walks through that workflow. Visit our Help Center chapter to learn more about Active Response.
This article covers the following topics:
- What you will learn
- Who is this for?
- When are Notifications sent?
- How notifications fit into the workflow
- What do end users see
- Do Administrators need to configure notifications?
- Customize the Notification Messaging
- Test and validate notifications
What you will learn
This article explains how end-user notifications work in Field Effect MDR, including:
- When notifications are sent
- What end users will see
- How notifications relate to automated response actions
Who is this for?
- Administrators / Partners: Understand when users are notified during automated response.
- End users: Know what to expect when an issue is detected and addressed
When are Notifications sent?
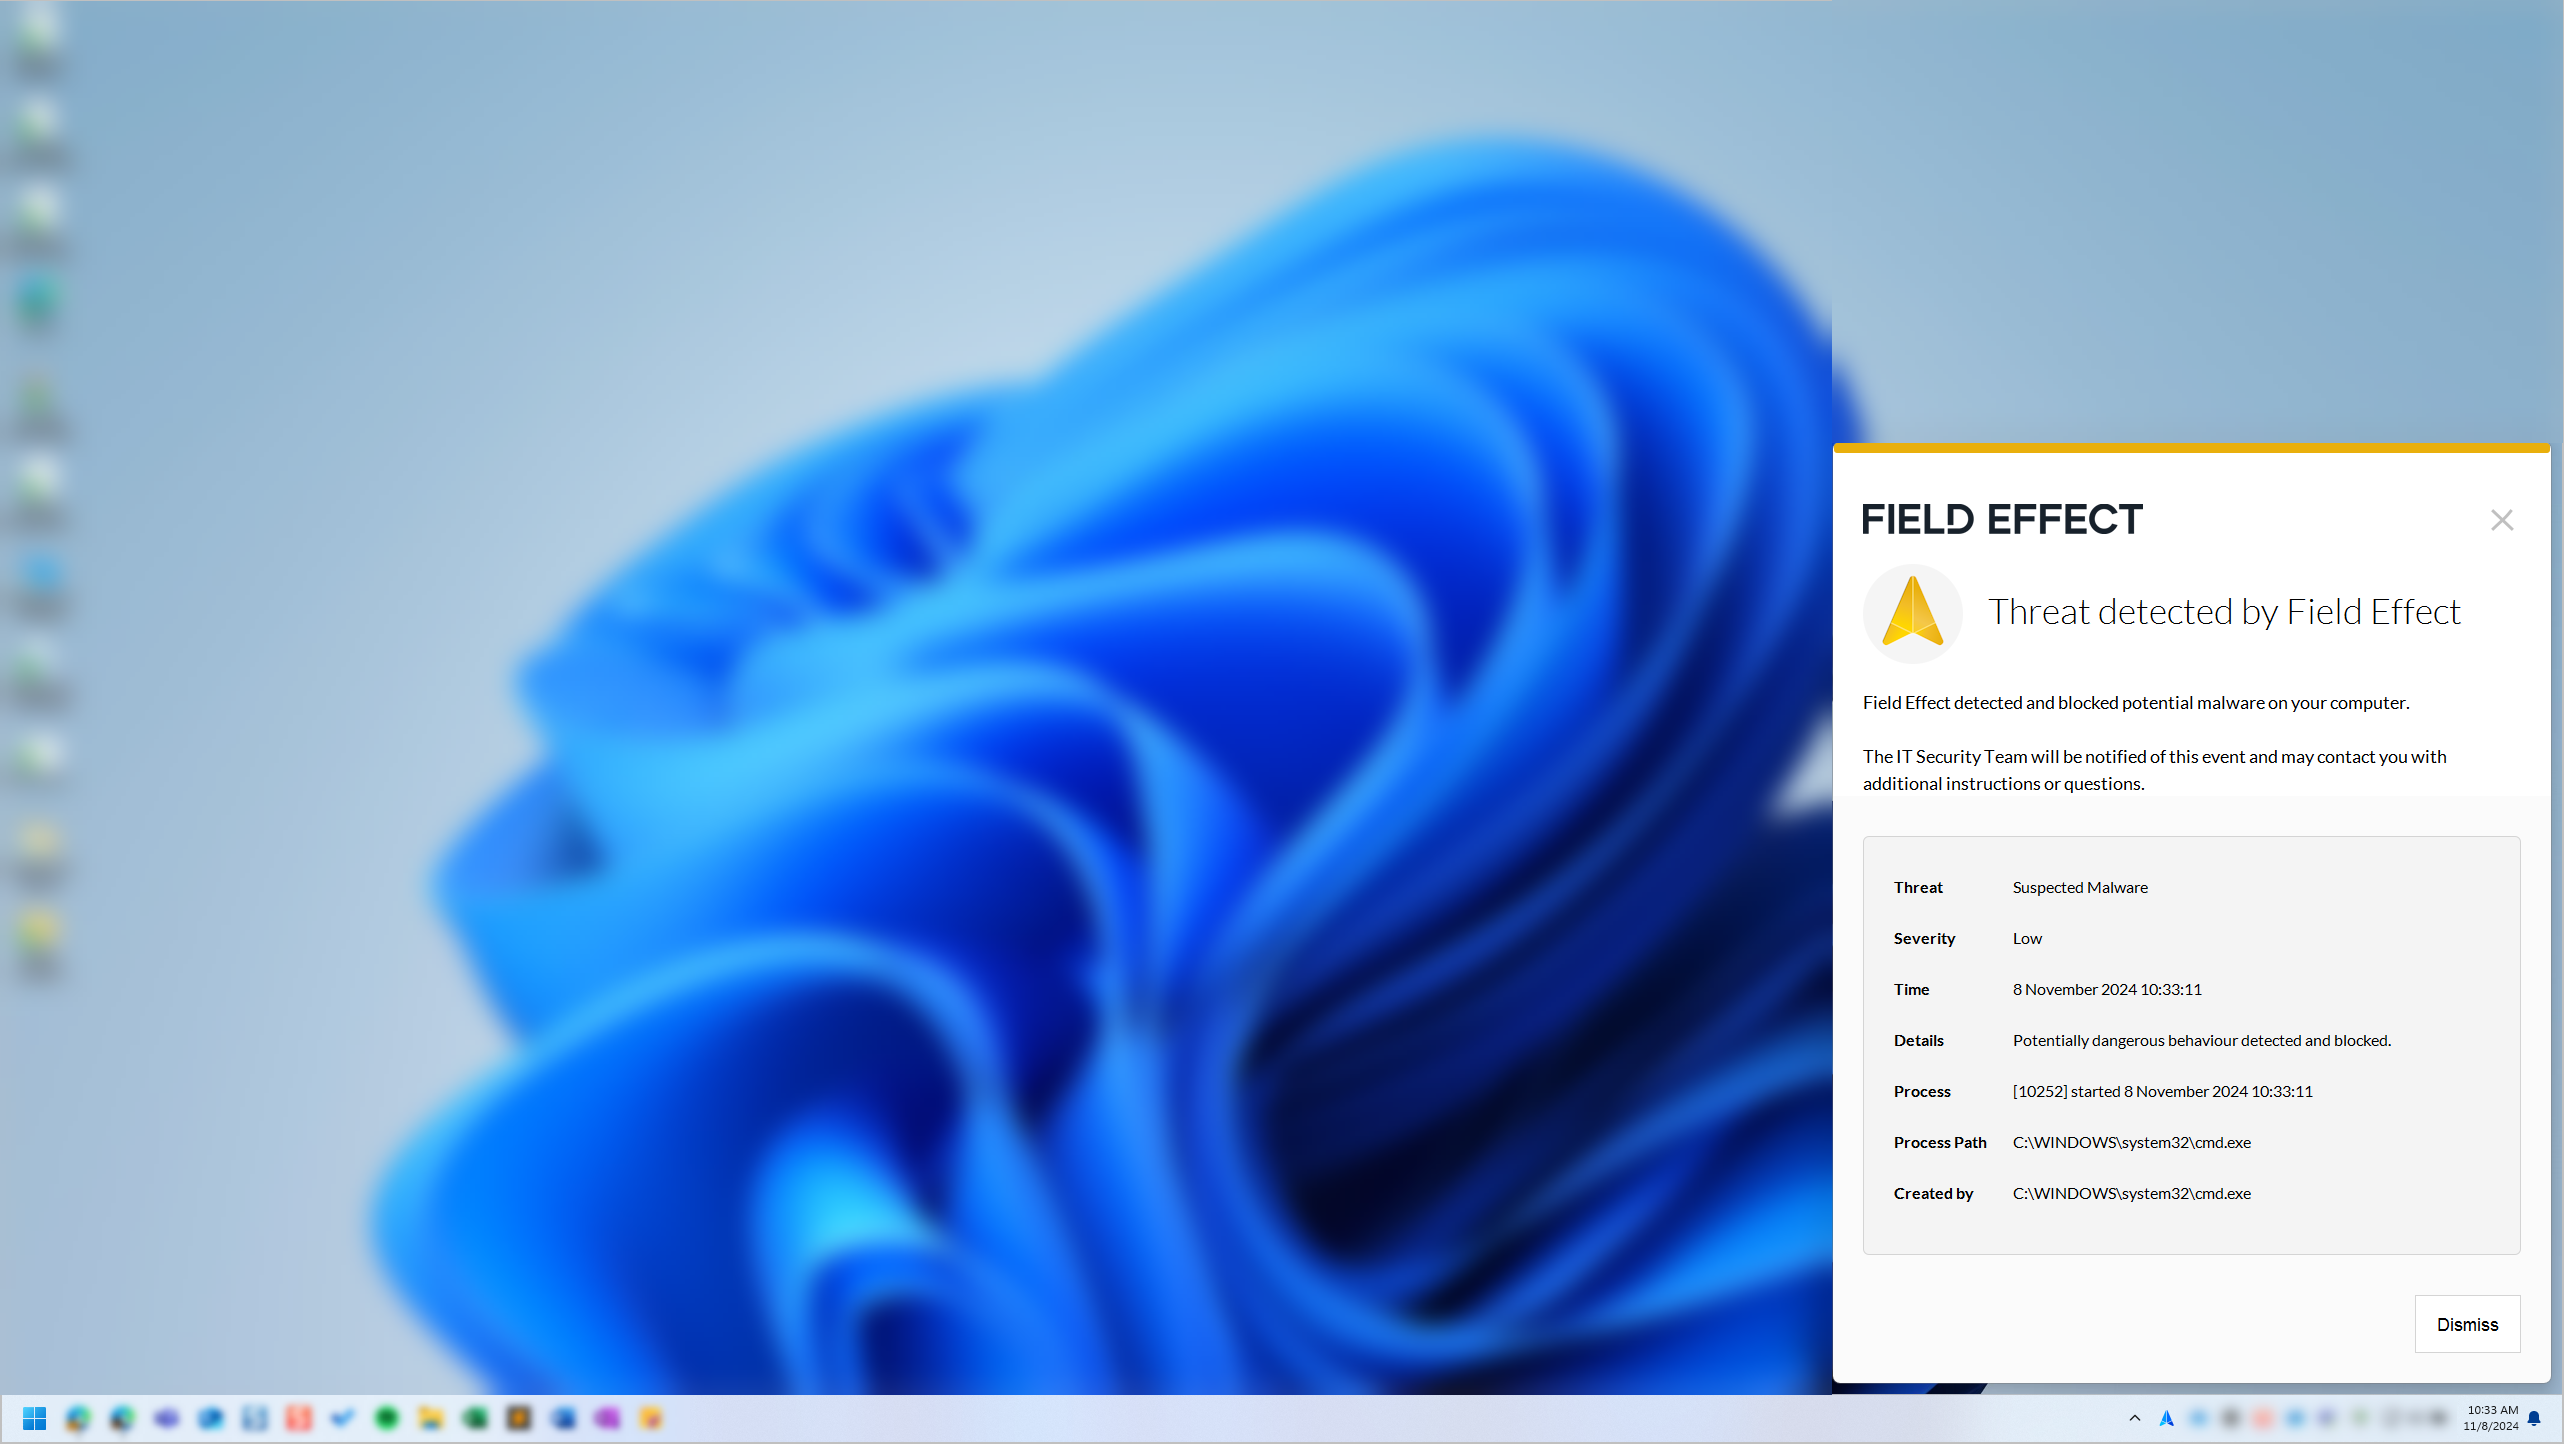
End-user notifications are triggered when an Active Response action affects a user’s system.
This typically occurs when:
- A detection leads to an automated response
- A response action interrupts user activity (e.g., process blocked, access restricted)
Notifications are designed to:
- Inform the user of what happened
- Explain why the action occurred
- Provide next steps (if required) and relevant contact information.
How notifications fit into the workflow
Notifications are part of the Active Response lifecycle, ensuring users are aware of changes affecting their systems.
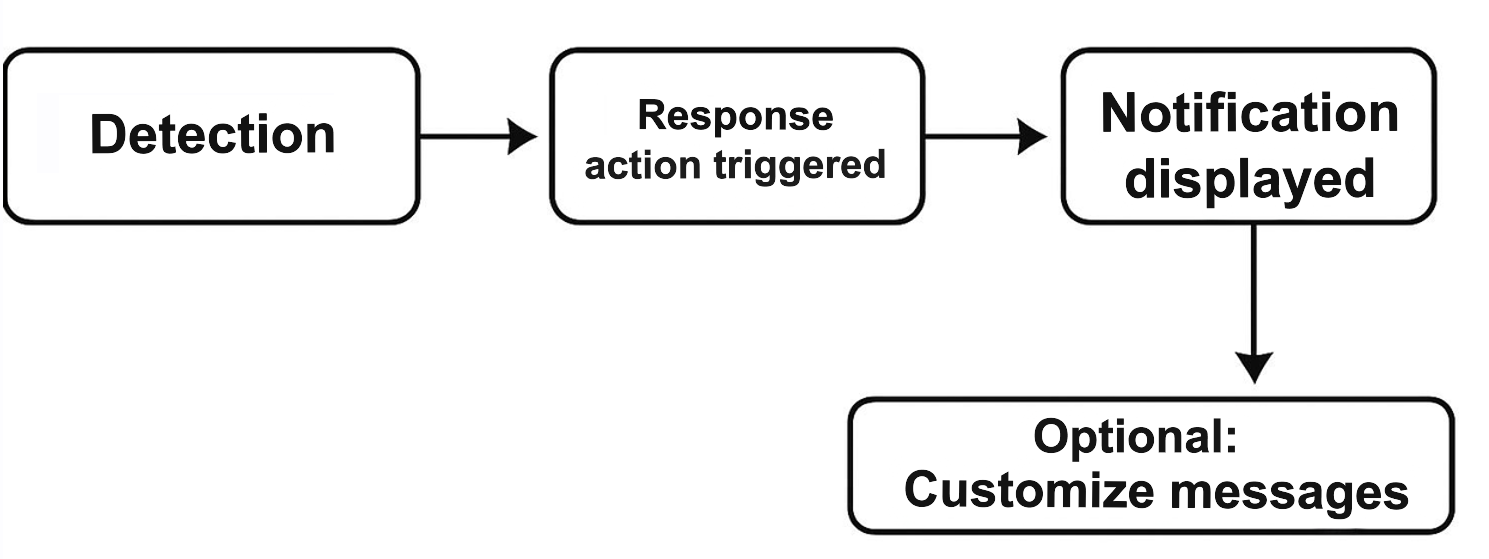
What do end users see
End users receive a notification directly on their device.
Do Administrators need to configure notifications?
In most cases:
- Notifications are automatically triggered as part of response actions
- No manual action is required for standard behavior
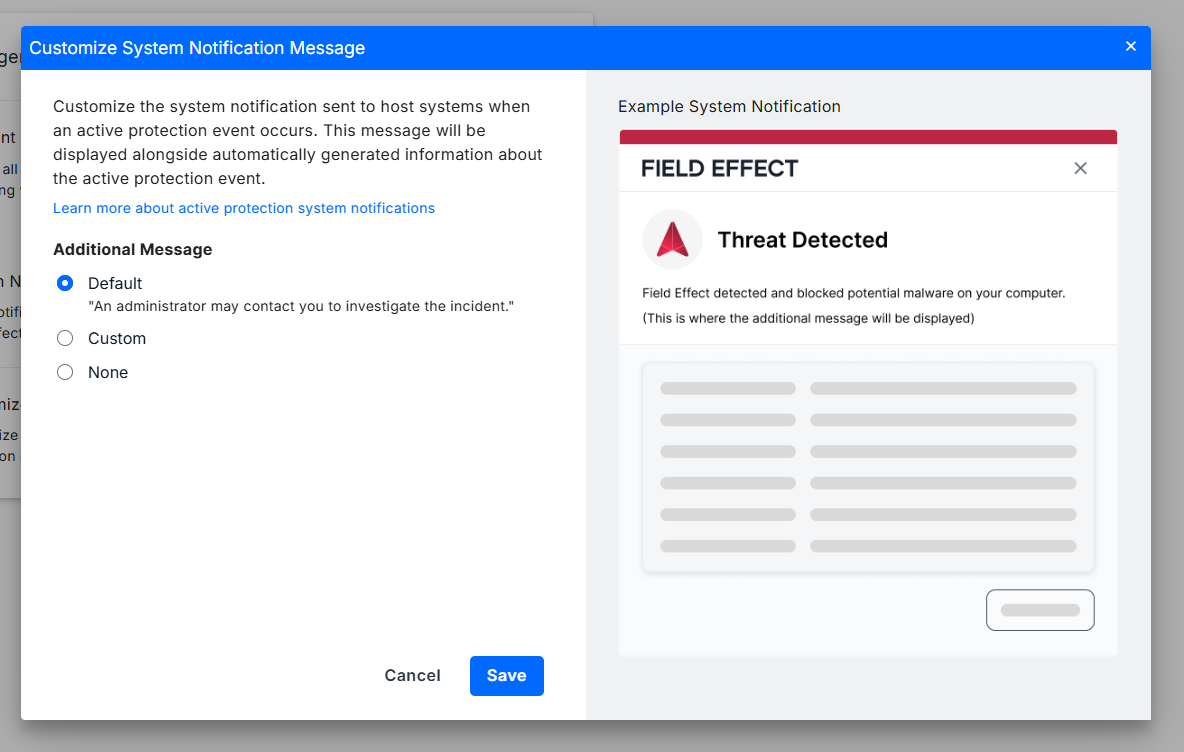
Customize the Notification Messaging
You can control what message appears in end-user notifications when Active Response actions are triggered.
The System Notifications toggle must be enabled before you can customize messages.
To customize your notification message:
- Go to Administration → Endpoint Agent
- Click Customize System Notification Message

In the Customize System Notification Message window, choose one of the following options:
- Default – Uses the standard message
- Custom – Lets you create your own message
- None – Removes the message entirely
Message options explained
Default
Displays the standard message: “An administrator may contact you to investigate the incident.”
Use this option if you want consistent, system-provided communication.
No message
Removes the message entirely from the notification.
Use this option if:
- You want minimal user interruption
- Notifications should remain purely informational
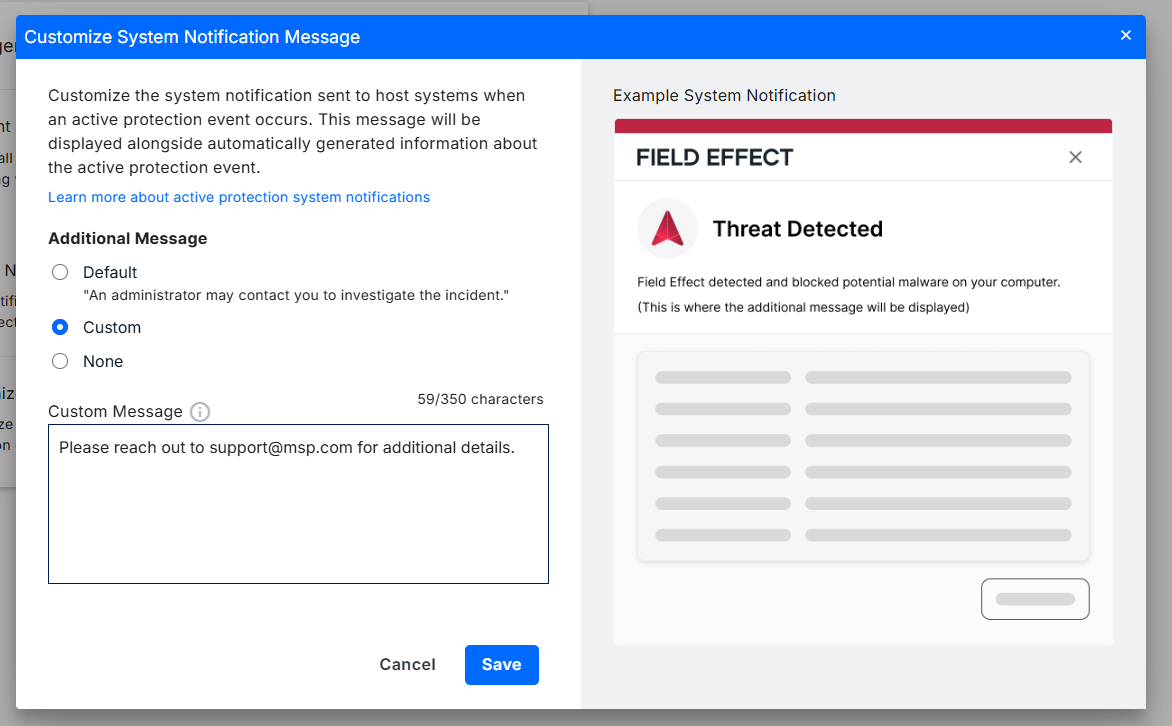
Custom message
Allows you to define your own message shown to end users.
When selected:
- A Custom Message field appears
- Enter your message and click Save
Limits and requirements:
- 350 character limit
- Some characters are unsupported
- Supported special characters include:
Alphabetical letters: a-z, A-Z
Spanish letters and accents: Á, á, É, é, Í, í, Ó, ó, Ú, ú, Ñ, ñ
French letters and accents: Ç, ç, É, é. Â, â, Ê, ê, Î, î, Ô, ô, Û, û, À, à, È, è, Ù, ù. Ë, ë, Ï, ï. Ü, ü
Numerical characters: 0-9
Special characters: “space”, “+”, “(“, “)”, “,” “,” “:” , “;” , “@”
Test and validate notifications
You can confirm how notifications appear to end users with the Endpoint Service Validation Test.
This allows you to:
- Preview your custom message
- Validate notification delivery
- Verify response behavior
Was this article helpful?
That’s Great!
Thank you for your feedback
Sorry! We couldn't be helpful
Thank you for your feedback
Feedback sent
We appreciate your effort and will try to fix the article